Getting started with Jibble’s Mac time tracker app
Effortlessly track your work hours, projects, and tasks on your macOS device
Jibble’s Mac time tracker is designed to help you efficiently track your time, manage your tasks, and improve productivity directly from your Mac desktop. Whether you’re working independently or as part of a team, our Mac desktop time tracking app makes time tracking a seamless and productive experience.
Jibble’s time tracker for macOS is compatible with macOS 10.15 and later. If you’re using a Windows desktop, check out our article on getting started with Jibble’s Windows time tracker.
Coming soon❗️: Desktop Kiosk mode is on the way – run a shared time clock on a Mac computer, with PIN and NFC clock-in!
This article covers:
Installing the Mac time tracker
- If you haven’t already, visit the Jibble website at https://www.jibble.io and create an account.
- Head to the Mac App Store and search for Jibble Time Tracking.
- Click “Get” to install the app on your Mac.
- Authorize the installation process and launch the app.
- Keep the Jibble app in your dock for easy access.
Using the Mac time tracker
-
Clocking In and Out
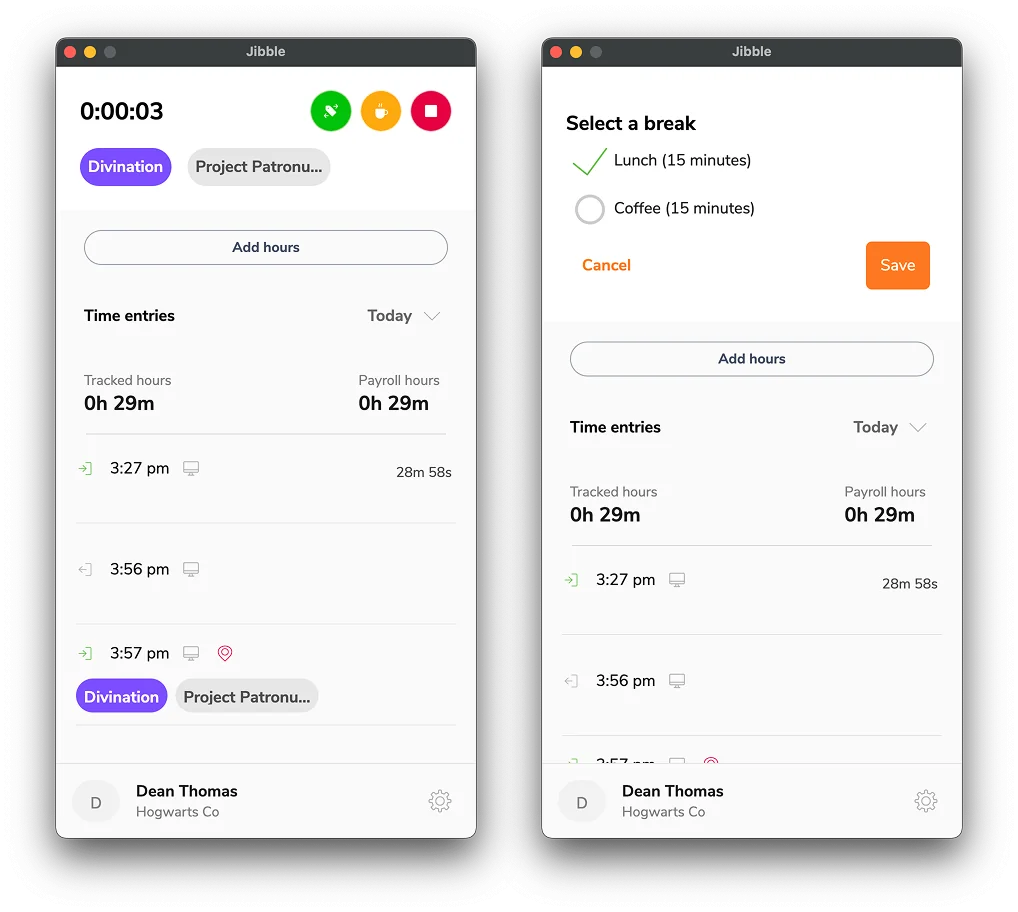
After installation, launch the Jibble Mac Time Tracker App and log in to your account. Click the green Play button to start clocking in your hours. While clocked in, you can switch to a different activity or project. To end your session, clock out using the red Stop button.![]()
-
Taking Breaks
During a clock in, you can start a break by clicking on the yellow Break button. If you have configured multiple break options, you’ll have the choice to select a specific break type. If you haven’t set up any break options, your break session will immediately begin upon clicking.
-
Screenshot Capturing
If your manager or admin has enforced screenshot capturing, you won’t be able to track time on the desktop app until screen capture permissions are granted on your device.

Once permissions are granted on your device, screenshots of all screens in the foreground will be captured depending on your interval configuration. You can set the interval to 2, 5, or 10 minutes, with each screenshot taken at a random moment within that window.
Screenshot capturing will start when you clock in via the desktop app and stops during breaks, after you clock out, or when you exit the app.
To learn more, read our article on how screen capturing works.
All captured screenshots can be accessed through the web app, where you’ll also have the option to view and delete your own screenshots. Read more about viewing and deleting screenshots.
-
Dashboard
Within the Dashboard, you’ll find your time entries, total tracked hours, and payroll hours for the present day. For more information on what’s included in tracked and payroll hours, check out our article on the difference between tracked hours and payroll hours.
-
Account Settings
To access your Account Settings, click on your name within the tab, located at the bottom section.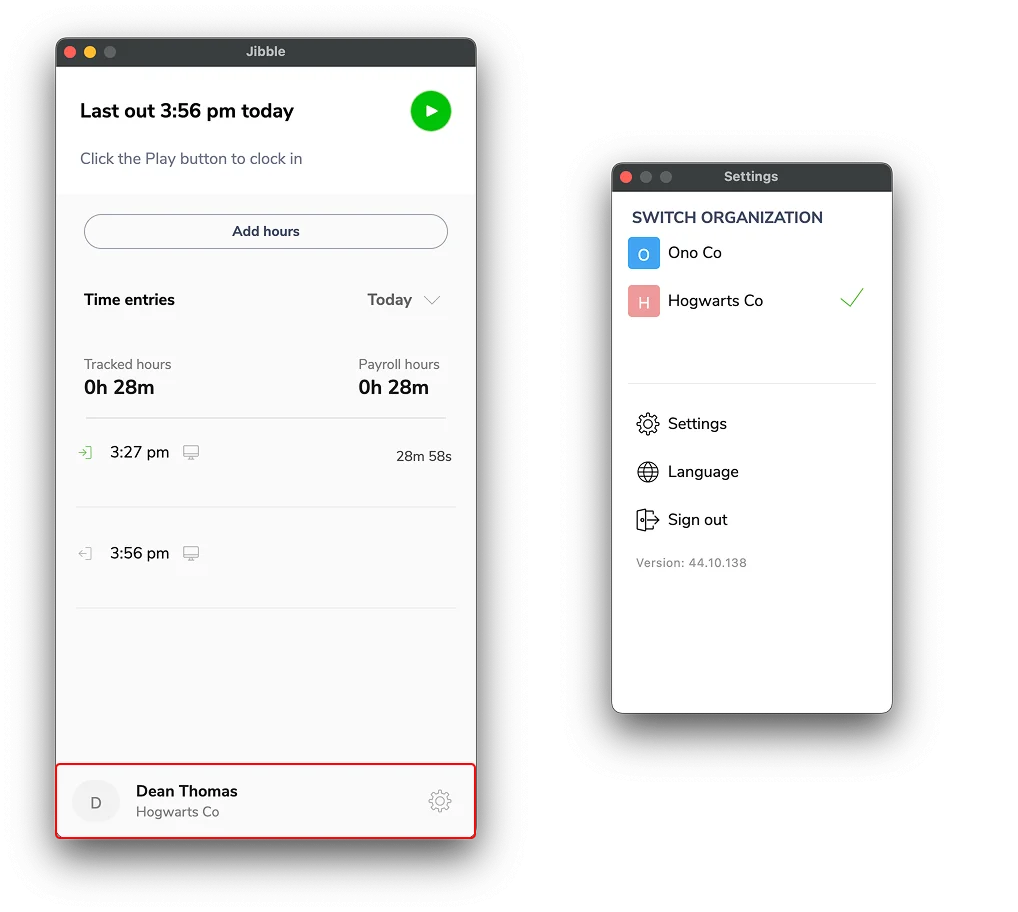
Here’s a brief overview of the available options:
1. Organization Details
If you are part of more than one organization, you have the flexibility to switch between them. Simply click on the organization you want to use to make the switch.
2. Settings
Under the Settings tab, you’ll find two sections: General and Privacy.
- General: Customize your time tracking experience by enabling automatic clock-ins and clock-outs, and setting up a default activity, project, and location for seamless tracking.
- Privacy: This is where you can enable Screenshots to permit your device to capture screen images while using the desktop app. Note that if screenshot capturing is enforced for you, you’ll be unable to track time on the desktop app until you enable this setting.
3. Language
Change the desktop app’s language to your preference by selecting from our supported languages. Check out our article on supported languages for more information.
4. Sign Out
Click Sign Out to log out of Jibble’s Mac time tracker.
-
Generating Reports
Make the most of the Jibble web app to produce in-depth reports and acquire valuable insights into your time management. The report features are available to owners, admins, and managers.
For more information on the various types of reports and how to export them using Jibble’s web app, check out our article on what are the different types of reports that can be exported.