Using Jibble as a Member
Learn about what you can do and how you can use Jibble as a Member
This article includes information that’s relevant to Members and their particular permission level. Learn all about using Jibble as a Member and how to seamlessly navigate the app.
Be sure to watch our video guide for a one-stop overview of Jibble’s features that you can share with your team members with Member permissions.
How do I know if I’m a member?
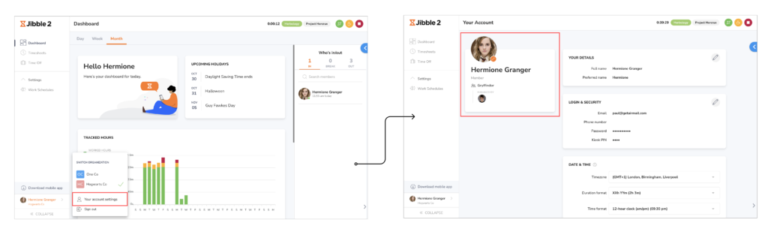
If you’re only using Jibble to track your own time, you’re most likely a Member. If you want to make sure, click your name at the bottom left corner of your account and click Your account settings. Under your name, you will see your role. If you are part of a group, you will also see the group you belong to and your respective manager.
What can I do as a Member? How does that compare to the other permission levels?
As a Member, you can track time on different activities and projects that have been set up by your organization. If permissions are granted to you, you may be able to edit your time entries or add time entries manually. In some cases, you will be able to view the Who’s in/out widget on your dashboard, which displays other team members in your group who are currently clocked in, on break or clocked out.
Owners and Admins can see and edit everything in the account—all activities, projects, clients, people and time. Managers are somewhere in between; they will be able to see and edit details of the people they manage. Check out this article on roles and permissions which breaks down exactly what each permission level can and can’t do.
What else should I know about using Jibble?
Joining an organization
Depending on how your organization has set up Jibble, you may be required to join your team on Jibble. Follow the steps indicated to join your organization and start tracking time on your personal account.
Signing in
To access your account for the first time, you’ll need to accept an invitation to join your organization. After that, you can sign in from the mobile app or on the web.
Tracking time
There are several ways you can track time in Jibble, which includes the web app, mobile app, shared kiosk, Chrome timer extension, Slack and Microsoft Teams. Follow the simple steps below to get you started tracking time in Jibble or read our article on the different ways to track time which covers everything you need to know.
- Web app
- At the top of the screen, you’ll see your timer buttons.
- Initiate the timer by clicking on the green play button to clock in.
- If necessary, select a location, an activity, and a project.
- Then click Save to start the timer.
- Once clocked in, you’ll see a few other timer options.
- Green switch activity button – move to another activity or project without stopping your timer.
- Yellow start break button – begin a break.
- If multiple break types are enabled, you can choose the one you prefer.
- Yellow end break button – finish your break and clock back in.
- Red clock out button – to clock out.
- Select a location if necessary and then click Save to clock out.
▶️ Step through the process yourself.
- Mobile app
- Log in to your account via mobile app available on both Android and iOS platforms.
- Navigate to the Time Clock screen.
- Depending on the settings configured by your manager, facial recognition or GPS tracking may be required for clocking in and out.
- The timer buttons here are similar to those on the web app.
- Tap the green Clock In button and select an activity and/or project to start the timer.
- Once clocked in, you’ll see the green Switch Activity button, yellow Start break button and red Clock out button.
- Proceed with creating your time entries by following the steps mentioned earlier.
▶️ Walkthrough how its done below.
Timesheets
Once you have started tracking time on Jibble, time entries are automatically created which go straight into your timesheets. View our guide on how timesheets work to learn about the different timesheet views and what your personal timesheet entails.
With Jibble’s web app, you can navigate to the Timesheets tab to review your time entries. You may select the date range for the timesheets you want to view (e.g., daily, weekly, monthly) and tap on a specific day’s displayed time to access detailed timesheets. This includes all the clock in, break and clock out entries made for that day. If selfies and GPS locations are enforced for you by your manager, you’ll be able to view your selfies and locations recorded during each entry. 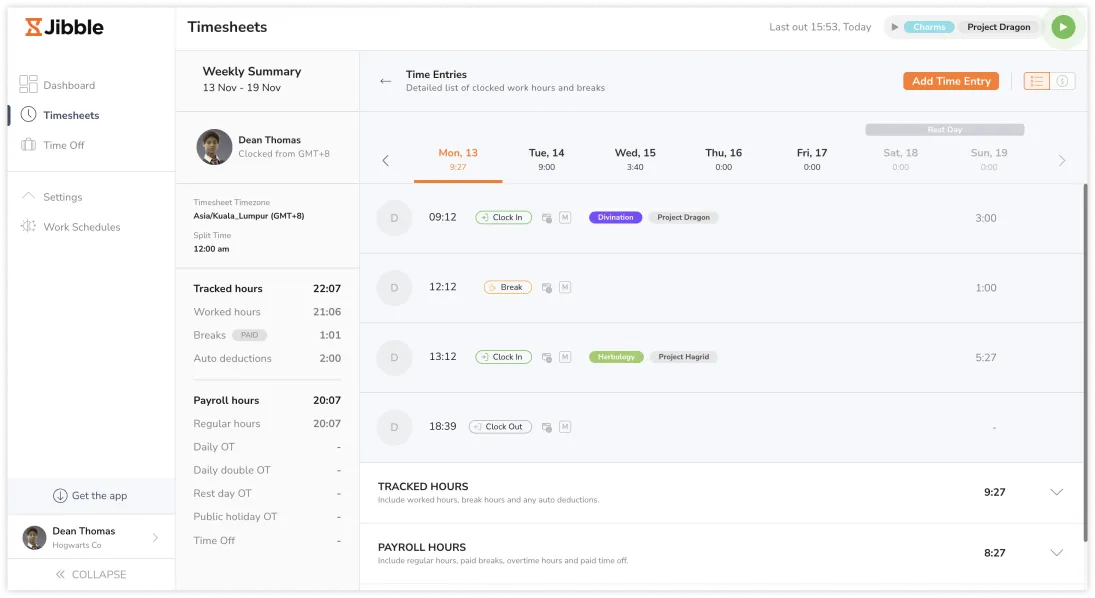
At the bottom of your detailed timesheets, you’ll see three drop down options: Tracked Hours, Payroll Hours and Change History. Tracked Hours include all hours worked, together with breaks whereas Payroll Hours are distributed among regular hours and overtime hours, if applicable. For a deeper understanding of the differences, check out our article on the difference between tracked hours and payroll hours. The Change History section shows you all the edits or changes made to your time entries, either by yourself or your manager.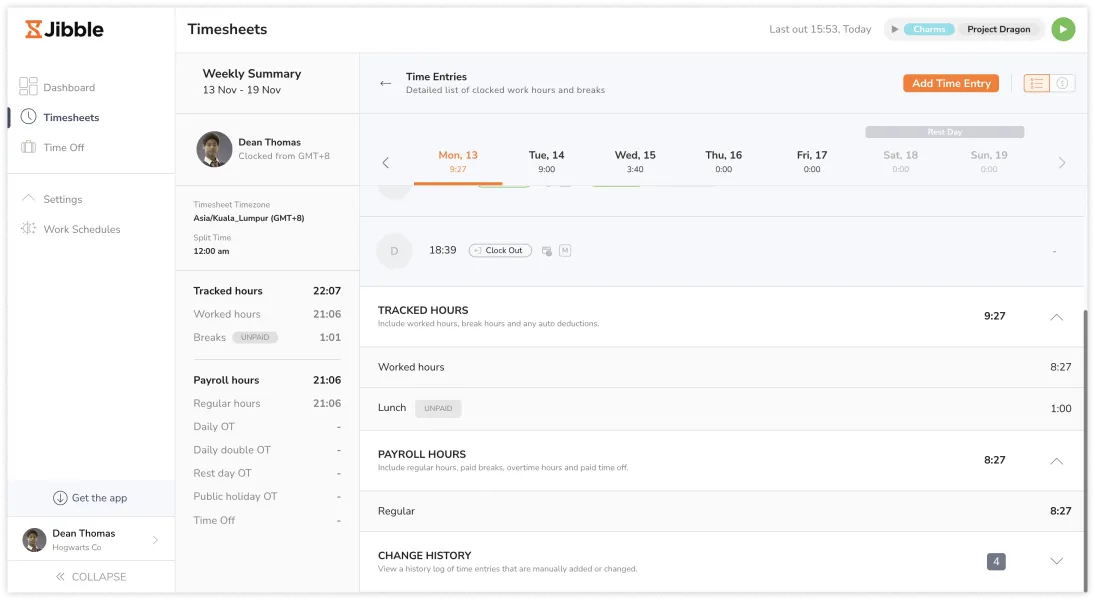
On Jibble’s mobile app, you can find your timesheets by navigating to Timesheets on the navigation menu. Click through the dates at the top of the screen or use the calendar icon to access time entries from different days. Tap on the View Daily Timesheet button to view the details of your time entries.
Facial recognition
If facial recognition is enabled for your organization, you are required to set up your face data which will be used as a baseline photo for Jibble to verify you. If face data has not been set up yet, you will be prevented from clocking in and out. Follow the steps indicated to set up your face data for facial recognition.
Location tracking
If location tracking is enforced, your GPS information will be automatically captured and saved into your timesheets upon clocking in and out via Jibble’s mobile app. Your organization might also have geofencing enforced, which only allows you to track time when your GPS location data is within an authorized location. Note that if GPS tracking is enforced, you will be required to grant the Jibble app access to your location via your device settings.
Notifications & Alerts
Reminders help you form a habit of clocking in and out at certain times based on your schedule. Notifications and alerts can be set via your account settings to receive clock in or out reminders throughout your workday. You will be able to receive notifications via email or via push notifications directly on your mobile device. Check out our guide on enabling push notifications for more information.
Account settings
Your account settings is where you can update your login details such as your password, personal notifications and alerts, data privacy and more. Read our article on what you can do and how to update your account settings to find out more.