Add or invite team members
Add or send invitations to employees to get them started on their time tracking journey
There are two ways to add or invite members to your team:
-
You can either invite them to log in and set up an account (with an e-mail address or phone number), or
-
Create them immediately (without an e-mail or phone number) so they can clock in/out from an attendance kiosk (shared time clock). Learn how to setup kiosk mode.
Note: On paid plans, you will be able to invite as many users as there are seats available in your account. If you do not have enough seats, you will be prompted to buy additional seats before you can invite or create other users to your team. Seats are based on an upfront payment basis, for more information, check out how my bill/invoice is calculated.
This article covers:
Inviting users
When you want your team members to have their own account (so they can log in through the web app or mobile app), you will need to invite them via the following options:
If the invite member toggle was disabled when adding, you can still invite them to join your organization at another time by clicking on the Invite button on their profile.
Invite via invitation link
Invitation link allows employers to send an invitation link directly to employees. Team members can simply click on the link and sign up to their respective organization.
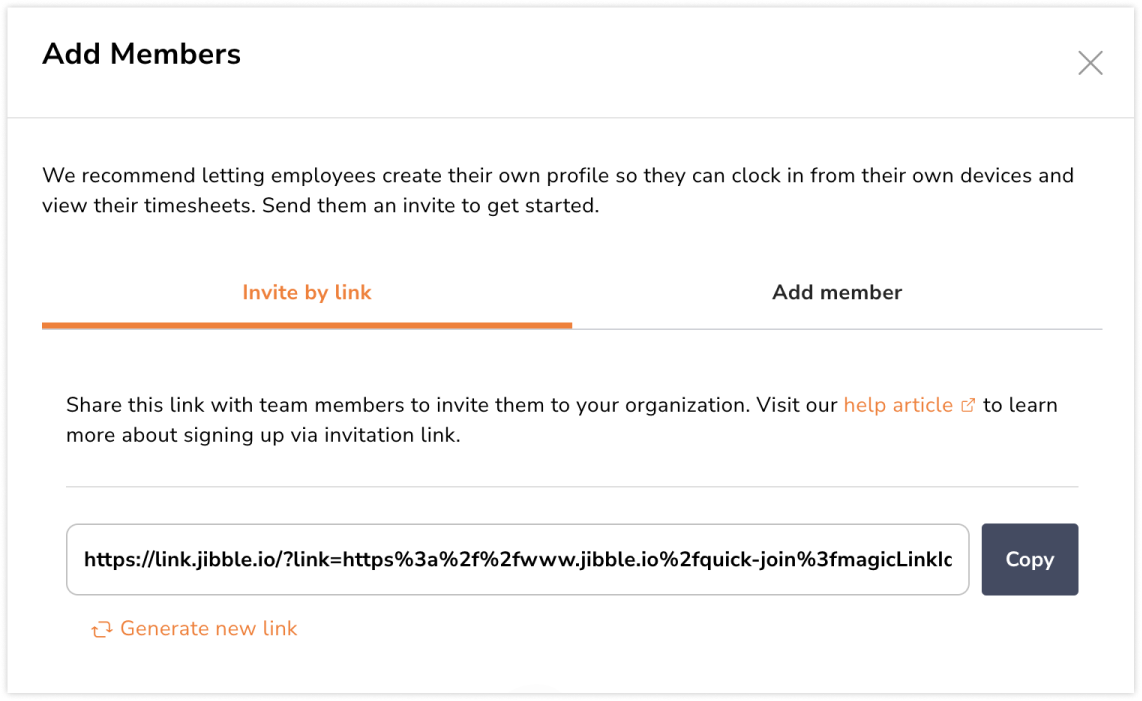
Steps to send an invitation link:
-
Go to People, and click on the Add Members button.
-
Click on the Invite by link option.
-
A link will be generated for you to use.
-
Click on the Copy button and paste the link to the team members you’d like to invite to your organization.
-
Have your employees click on the link and sign up to their respective accounts.
Note: As an owner/admin, you can choose to deactivate any existing link by clicking on “Generate new link”. By doing so, any existing links available will be automatically expired.
Invite via email address or phone number
Before inviting your employees, ensure that you have verified your email address upon signing up to Jibble. If you haven’t done this step, invitations will not get sent out.
- Go to People.
- Click on Add Members, and you’ll automatically land on the Add member page.
- Click on the Add Member tab.
- Enable the toggle for Invite member.
- Enter the full name, e-mail/phone number of the person you wish to invite.
- Click on Add new member if you wish to invite more.
- Click on Save.
- That’s it! Your team member will receive an invite to join your organization.
Note: For detailed steps on how to accept invites, check out our article on joining your organization.
▶️ Click through to see how it works.
Adding users without sending invitations
If you only use an Attendance Kiosk, and you don’t need your team members to login for clock ins, you can still create your team members’ profiles without sending out an invite:
- Go to People.
- Click on Add Members, and you’ll automatically land on the Add member page.
- Disable the toggle for Invite member.
- Enter the full name of the person you wish to add. (the email address/phone number field can be left empty).
- Click on Add new member if you wish to add more.
- Click on Save to add.
If you later want to invite a member to access their account, simply add their email/phone under their profile to invite them.
▶️ Give it a try below.
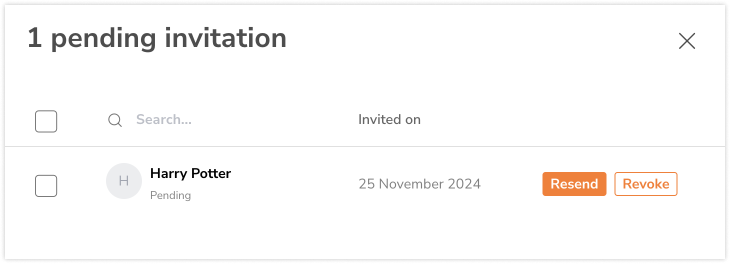
Resending and revoking invitations
As an owner or admin in Jibble, you will be able to resend pending invitations if there were errors in the initial invitations or revoke pending invitations for team members who should no longer have access to your Jibble organization.
Note: Resending and revoking invites are only applicable to pending email or phone number invitations.
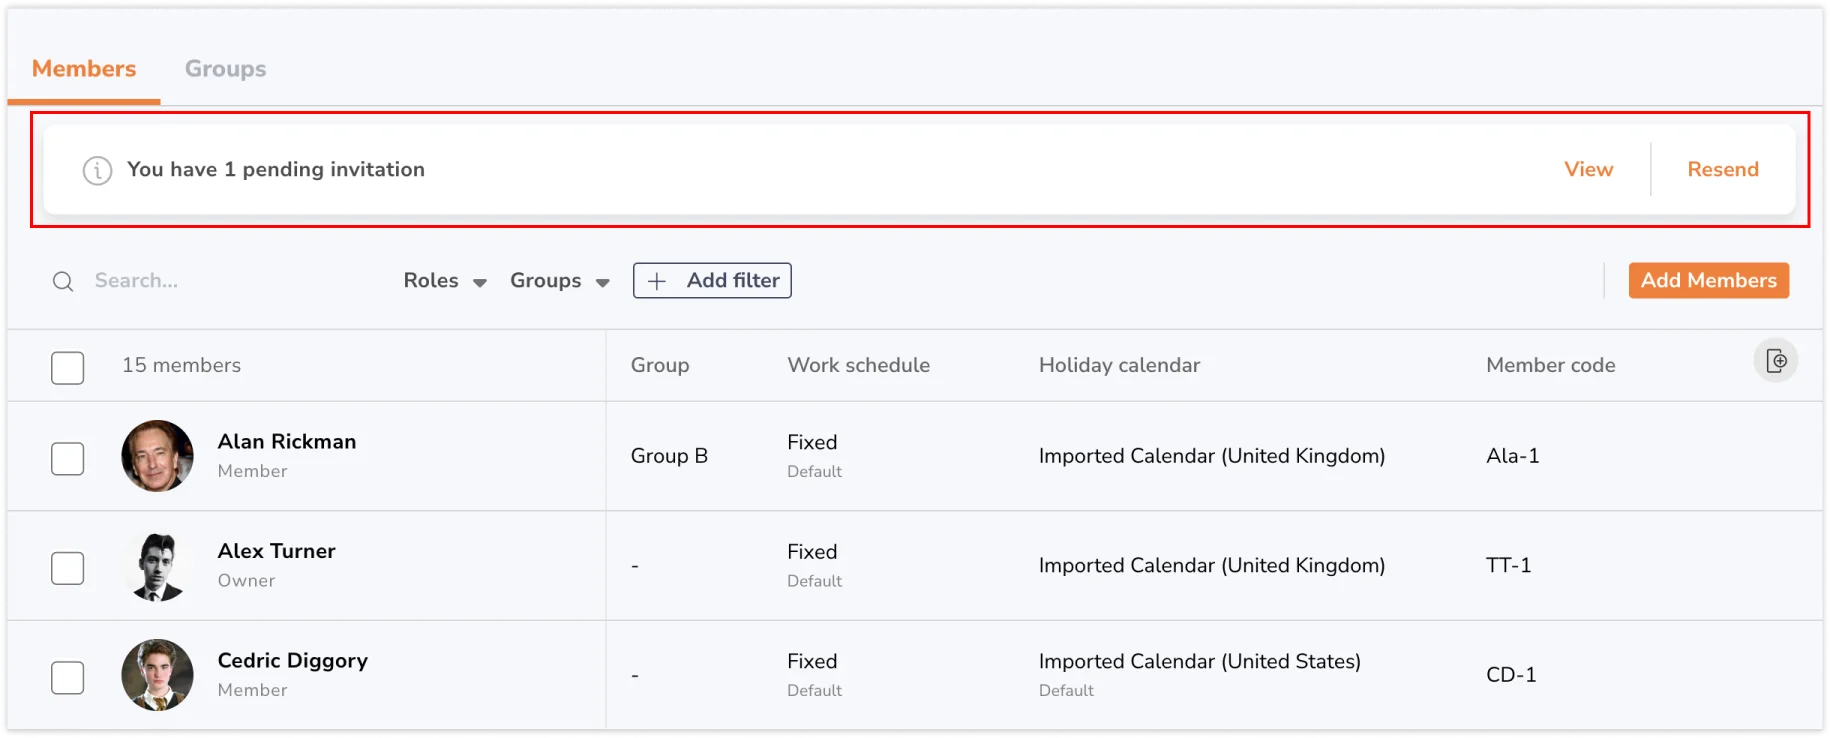
- Go to People.
- A pending invitations box will be displayed showing you the total number of pending invitations available.
 Note: If there aren’t any pending invitations in your organization, you will not see this box.
 - Click on View to view the details of each invite.
- Click on Resend to resend an invitation to your team member.
- Click on Revoke to revoke a pending invitation that has been sent to your team member.