Managing locations & geofences
Manage locations and geofences for accurate time tracking
Fully harness Jibble’s employee GPS tracker by setting up and managing locations and geofences for your members to clock in and out of.
This help article will guide you through the process of managing locations and geofences effectively, ensuring that your time tracking system is optimized for your business needs.
Important❗️: Location tracking is only available on GPS enabled mobile devices.
This article covers:
- Adding locations
- Searching for locations
- Editing locations
- Archiving locations
- Permanently deleting locations
Adding locations
- Go to Locations.
- Enter an address in the search bar on the map.
- Select the full address from the search results.
- Click Add new location.
- Review and edit the location details if needed, and set a radius for the location.
Tip 💡: We recommend radiuses to be set to 300 meters to power features such as automatic clock in or out by geofence.
- Click Save.
▶️ Click through to see it in action.
Adding a missing location
If the exact location isn’t found via the search function:
- Go to Locations.
- Enter an address in the search bar.
- From the dropdown menu, click Add missing location.
- Drag and position the pin on the map to accurately capture your location.
- Click Done.
- If needed, fine-tune the coordinates in the sidebar and update the location details.
- Set the radius of the location.
- Click Save.
Once a location is added, it can be assigned to work schedules to control which locations members are allowed to clock in/out from. To learn more, check out manage work schedules.
▶️ Try out the steps one by one.
Searching for locations
When searching for locations, you have two options to streamline your results:
- Search within added locations
- This option narrows down results to only include existing locations in your list.
- Search within new locations
- This option broadens the search to include options not present in your existing locations.
- Go to Locations.
- Click on the dropdown arrow on the search bar.
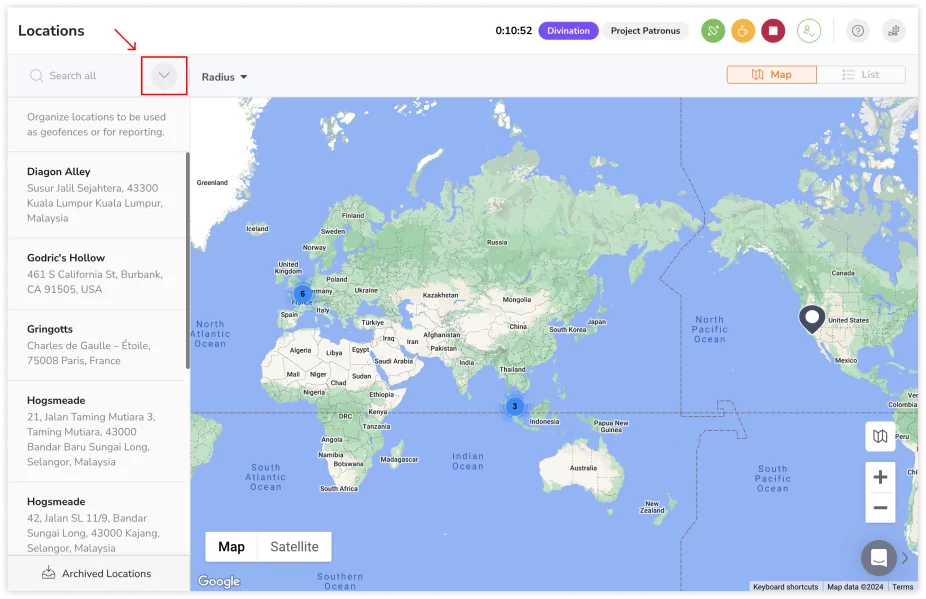
- Select whether you wish to search for New locations or Added locations.
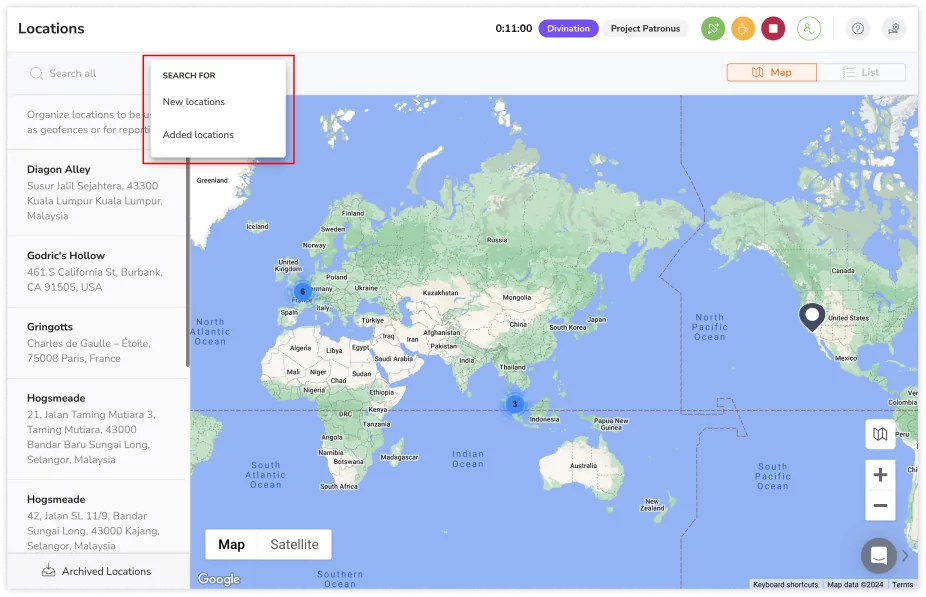
- If no selection is made, the search results will include both added and new locations, with added locations listed at the top and new locations at the bottom.
- Enter the name of an added/new location in the search field.
Editing locations
You will be able to edit the details of your locations, including the name, coordinates or radius of the location. Edits made to locations will not affect past time entries.
Editing location radius in bulk:
For seamless location editing, you can adjust the radius of multiple locations in bulk. Bulk operations can only be done via List view.
- Go to Locations.
- Click on List view on the top right corner.
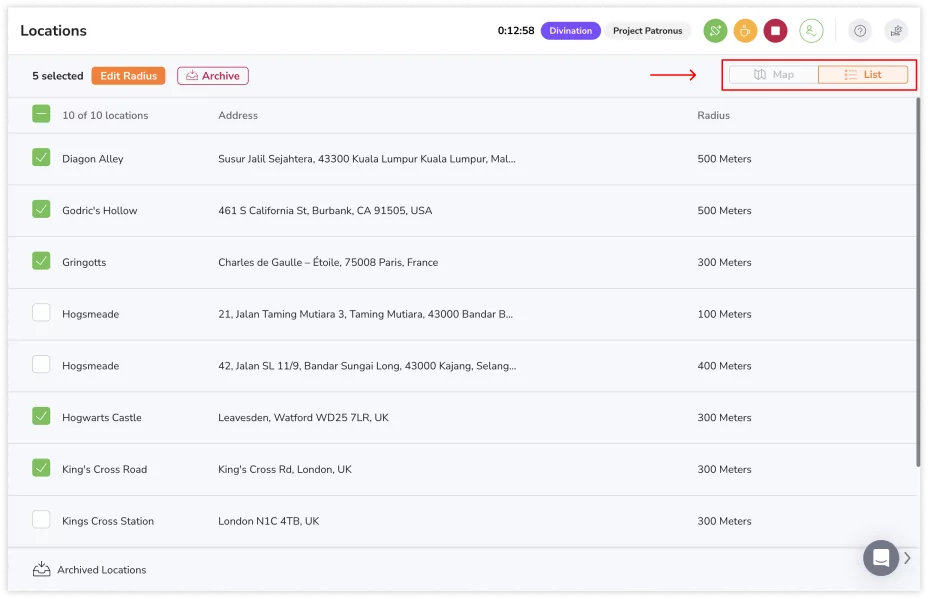
- Select the checkboxes next to the locations you wish to edit.
Tip 💡: Use the radius filter for targeted location results based on their current radius. - Tap on Edit Radius.
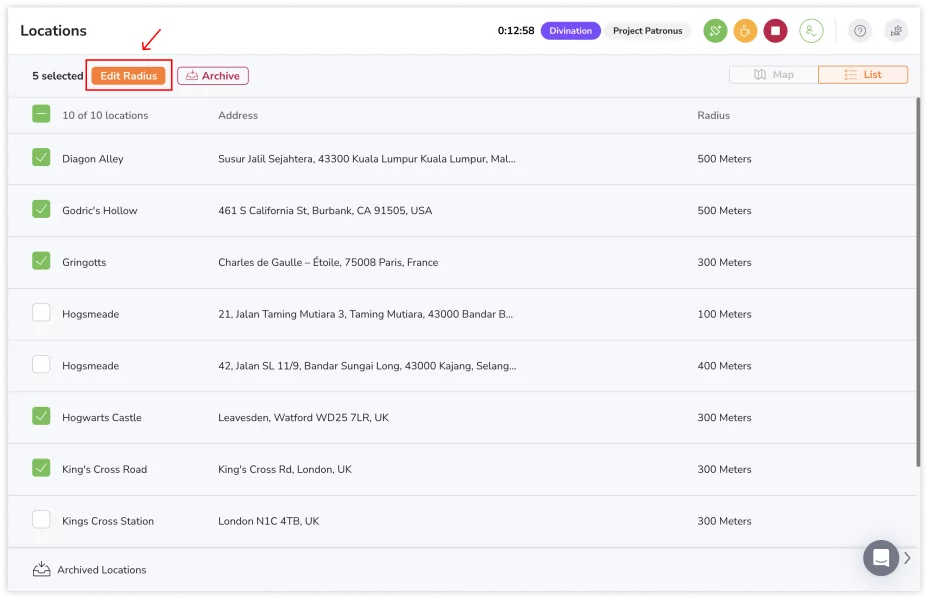
- Choose a radius from the available options.
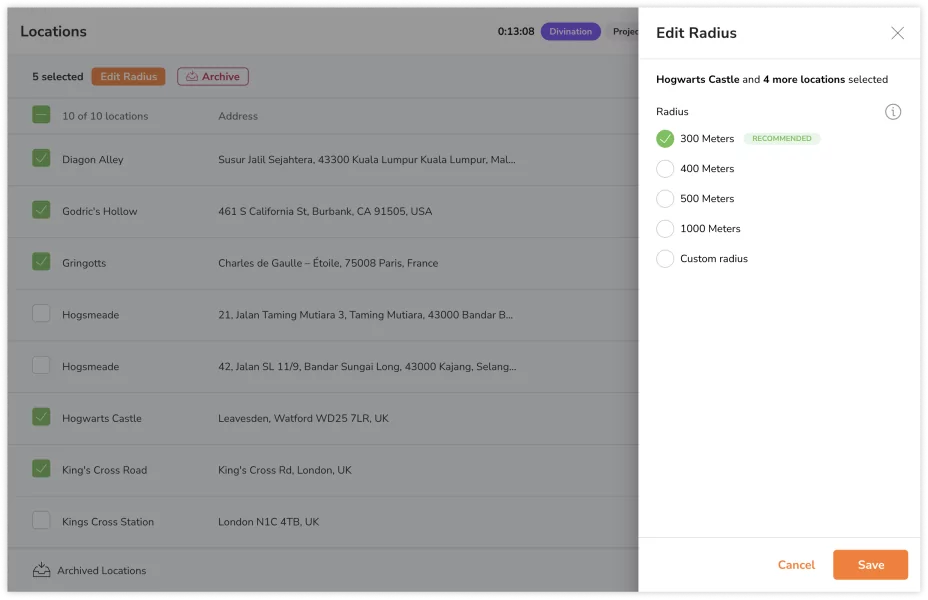
- Click Save.
Editing individual locations:
- Go to Locations.
- You can either use the Map view or List view.
- Click on a location you wish to edit.
- Click on the pencil icon to make changes.
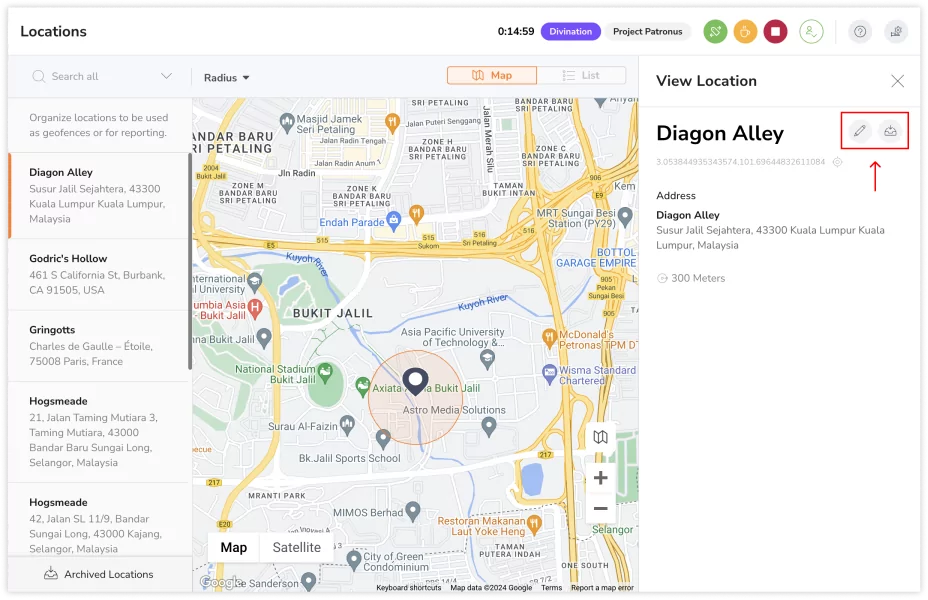
- Adjust the necessary location details.
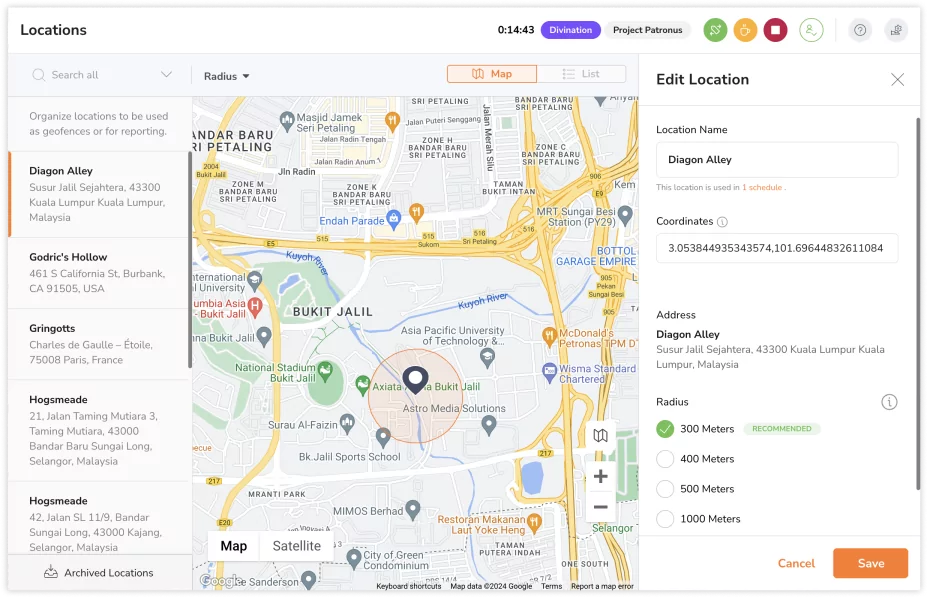
- Click Save.
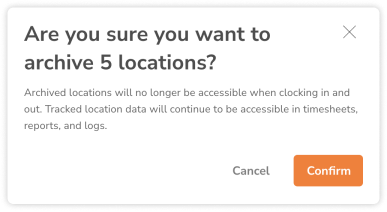
Archiving locations
If a location is no longer in use, you can easily archive it, removing it from time tracking and filter lists. All archived locations are stored in the Archived Locations list at the bottom and can be restored at any time. All past time entries with this location will not be affected.
Archiving individual locations:
- Go to Locations.
- You can either use the Map view or List view.
- Click on a location you wish to archive.
- Click on the bin icon.
- Tap on Confirm.
Archiving locations in bulk:
Bulk operations can only be done via List view.
- Go to Locations.
- Click on List view on the top right corner.
- Select the checkboxes next to the locations you wish to archive.
- Click on the Archive button.

- Tap on Confirm.
Permanently deleting locations
- Go to Locations.
- Click on Archived Locations to view the archived list.
- Click on the Delete button on any location.
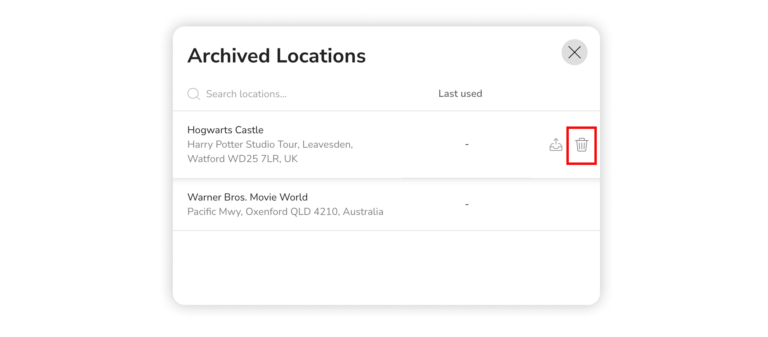
- Confirm your action.