
Using Kiosk mode on Jibble’s desktop app
Turn any Windows or Mac computer into a shared time clock for your team
Jibble’s desktop kiosk lets you run a shared time clock on a computer, giving your team a convenient way to clock in and out from a fixed location.
Employees can quickly record their attendance from a central device using Jibble’s verification methods, without needing a dedicated tablet or physical time clock.
This article covers:
- Installing Jibble on your computer
- Setting up Kiosk mode
- Switching to Kiosk mode
- Managing Kiosk settings
Installing Jibble on your computer
Before setting up Kiosk mode, download and install the Jibble desktop app on the computer you want to use as your shared time clock.
- Download Jibble for your operating system:
- Launch the Jibble desktop app.
- Log in using your Jibble account credentials.
If you’re new to Jibble, learn more about setting up Jibble for the first time.
Setting up Kiosk mode
Note❗: Only Owners and Admins are able to create new kiosks. Managers can switch between kiosks that have already been created.
Before enabling Kiosk mode, make sure:
- The computer is connected to the internet.
- Employees have been added to your Jibble organization.
To set up Kiosk mode:
- Click on the gear icon in the desktop app.
- Click on Create Kiosk.
- A confirmation message will appear letting you know that your PIN will be requested to switch back to Personal mode.
- Click on Confirm.
- Enter a kiosk name and select the members and groups you want to assign to the kiosk.
- Click on Create.
- Set up an Admin PIN to manage kiosk settings.
- Your kiosk will open in full screen.
Tip💡: Kiosks are shared across platforms. A kiosk you created via Jibble’s mobile app will appear in the list on Jibble’s desktop app, with the same members and groups already assigned.
Switching to Kiosk mode
If you already have a kiosk set up, you can open it from the desktop app at any time.
Note❗: Only Owners, Admins and Managers can run a kiosk or switch between kiosks.
To switch to Kiosk mode:
- Click on the gear icon in the desktop app.
- Click on Switch to Kiosk.
- Select a kiosk from the list.
- Your kiosk will open in full screen.
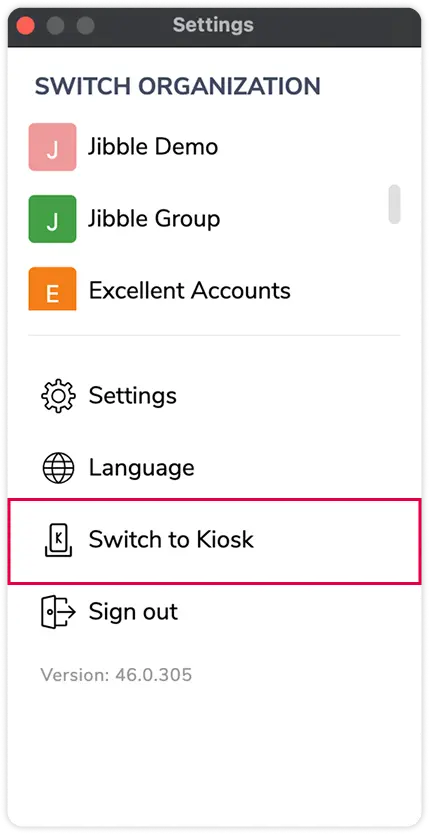
To exit Kiosk mode:
- Click on the gear icon on your kiosk screen and enter your Admin PIN.
- Click Switch to Personal Mode.
- The app will exit Kiosk mode and return to your personal account.
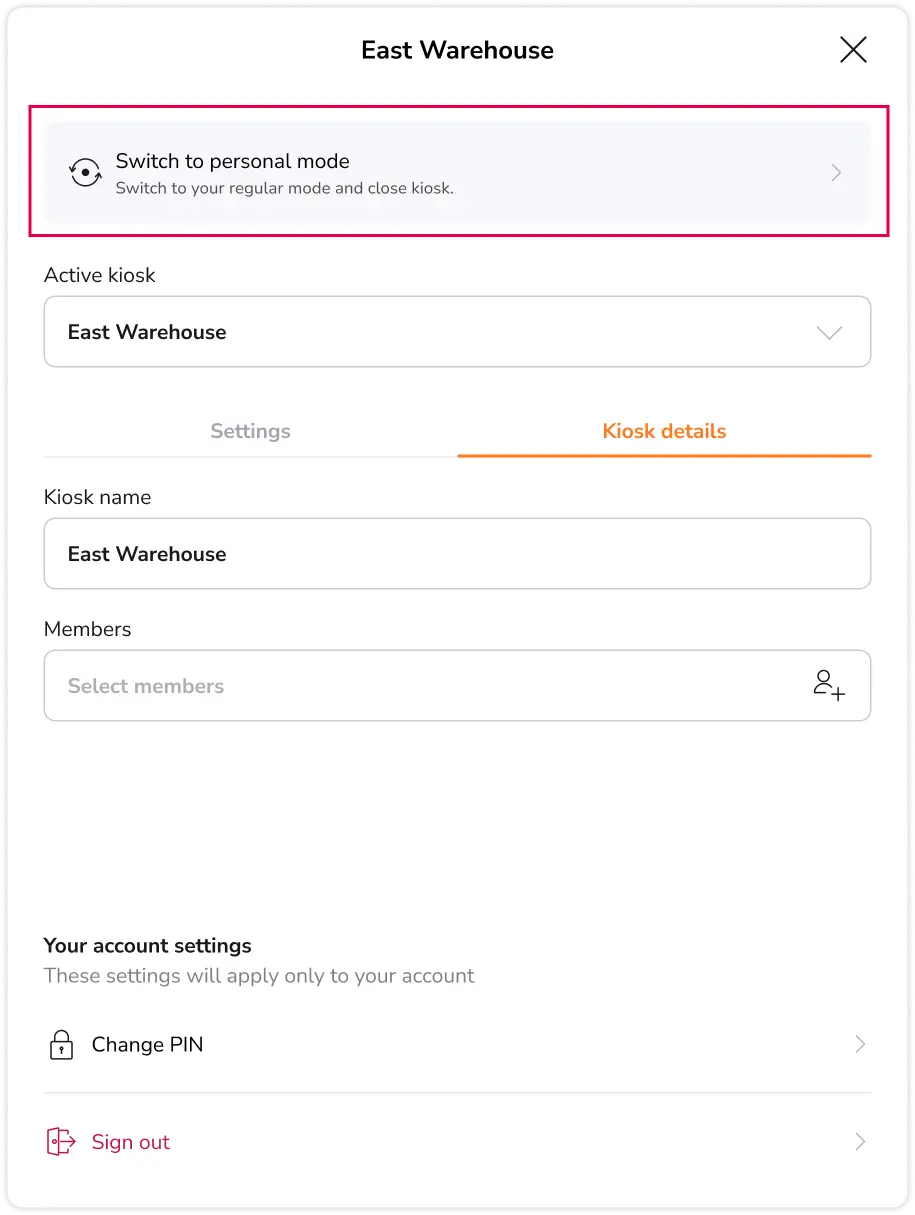
Managing Kiosk settings
Once your kiosk is up and running, you can customize its settings based on your team’s needs. These settings are separate from your general Time Tracking settings and only apply to the specific kiosk currently being used.
Kiosk settings are stored locally on each computer. This means that two computers running the same kiosk can have different configurations. Only the kiosk name and assigned members are synced and remain consistent across devices.
Note❗: Kiosk settings are only accessible to Owners, Admins and Managers using their own PIN. If you wish to change the settings for another kiosk, you will need to switch to that kiosk first.
Changing kiosks
Owners, Admins and Managers can switch to another kiosk under the Active kiosk section without leaving kiosk mode. Once another kiosk is selected, the current kiosk will immediately switch over.
Settings
Kiosk settings are configured based on the kiosk mode selected and only apply to the kiosk currently being operated.
Available kiosk modes:
- Basic Mode: Members clock in and out by selecting their name from a list.
- NFC Mode: Members clock in and out by tapping their NFC tags. (Coming soon!)
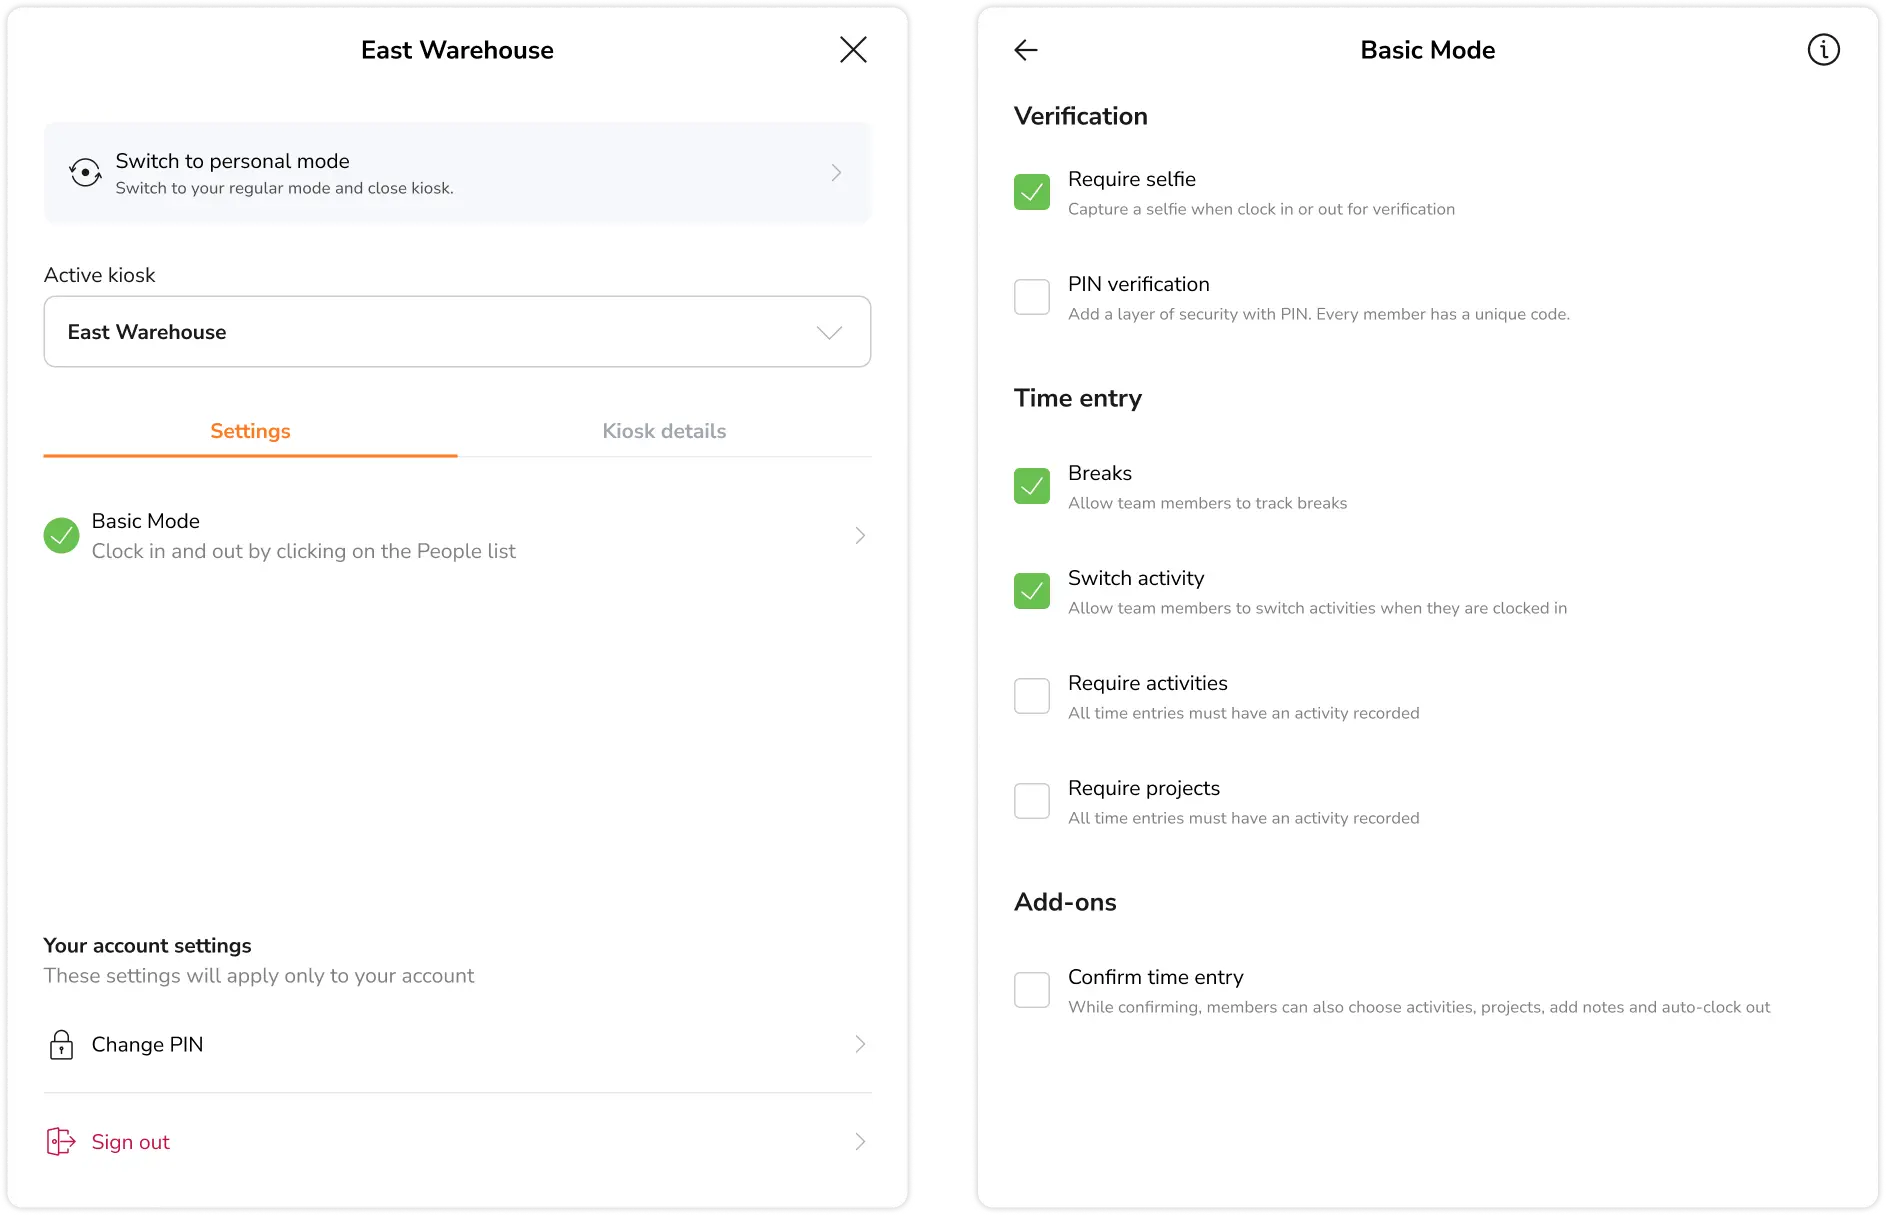
Basic Mode
With Basic mode, members simply select their name from the People list to clock in or out. No additional hardware is required, making it the quickest mode to set up and a great option for smaller teams where everyone can easily find their name.
The settings that are configured under Basic mode are as follows:
- Require selfie: Captures a photo of each member as they clock in or out, which you can review later on Timesheets.
- PIN verification: Requires members to enter their PIN before clocking in or out.
- Breaks: Shows the break button while members are clocked in, so they can track break periods.
- Switch activity: Lets members change activity without clocking out first.
- Require activities: Members must select an activity before they can clock in.
- Require projects: Members must select a project before they can clock in.
- Confirm time entry: Shows a confirmation screen before each clock in, clock out, break start and break end.
- Offline time tracking: Lets members keep clocking in and out when the computer loses its internet connection. Entries sync automatically once it’s back online. (Coming soon!)
Note❗: Some kiosk settings available on the mobile app are not yet supported on the desktop app, including facial recognition, GPS tracking, and geofencing. If your team requires these features, we recommend using Jibble’s mobile app on a phone or tablet for your kiosk setup.
Kiosk details
- Kiosk name: The kiosk name is set when you first create the kiosk and can be updated at any time. Changes to the kiosk name apply to every device running that kiosk.
- Members: Displays the list of members assigned to the kiosk.
Your account settings
These settings apply only to your personal Jibble account.
- Change PIN: The Change PIN option only updates your own personal PIN.
- Sign out: Sign out of your Jibble account.