Mobile App: Create and manage groups
Understand the purpose of groups and how to manage them
With Jibble’s time tracking tool, creating groups allows you to sort team members into relevant groupings for better management. Groups can be created based on work location, department or any team of people that have similar work activities. This feature is particularly helpful for admins and managers who need to structure their teams for clearer oversight.
This article covers:
Creating a group
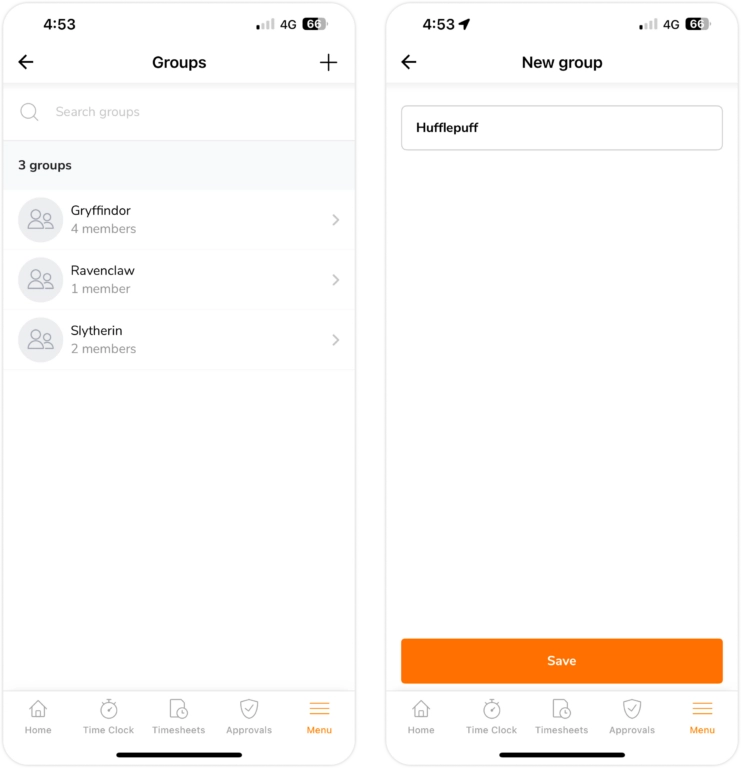
To form a group, there are two methods:
- Go to Menu > Groups tab and click the + icon on the top right corner to add a new group.
- Or, go to Menu > Members tab, long click to bulk select members, and click on Create new group.
You will be able to input a group name when creating groups.
Important❗️: Anyone can only be a part of ONE group at a time. Managers, admins and owners are still able to manage multiple groups, without being a part of them.
Configuring groups
After creating your groups, there are a few other things you can configure on the mobile app. For more information on configuring group settings via the web app, read our web article on creating and managing groups.
Adding and removing members from a group
To assign a member to an existing group:
- Go to Menu > Members tab.
- Click into the preferred member’s profile.
- Click on the Group field and select the group you want.
- Click on done and your member will now be a part of the selected group.
Note: Learn more by reading this article on assigning members to groups.
To remove a member from a group:
- Go to Menu > Groups tab.
- Select the group with a member you want to remove.
- Swipe left on the member and click on Remove.
- Click on Confirm to unassign them from the group.
▶️ Learn the steps below:
Moving group members
To move group members to another existing group:
- Go to Menu > Groups tab.
- Select the group with a member you want to move.
- Swipe left on the member and click on Move.
- Select the new group to move them to and click Done.
▶️ Do it yourself with our guided demo:
Configuring advanced group settings
To configure advanced group settings:
- Go to Menu > Groups tab.
- Select the group you want to configure.
- Click on the gear icon on the top right corner.
- Tap on Advanced group settings.
- By default, group settings will follow the organization Time Tracking Settings.
- To override it, disable the toggle to customize Time Tracking Settings on a group level.
▶️ Check out this walkthrough:
Deleting a group
Groups can be deleted via the mobile app as a permanent action. To delete a group:
- Go to Menu > Groups tab.
- Select the group you want to delete.
- Click on the gear icon on the top right corner.
- Click on Delete group.
- After confirming your action, the group will be permanently deleted.
Note: Group members that were a part of the deleted group will be ungrouped.
▶️ Have a look at how its done: