
Managing NFC tags on the desktop kiosk
Link your team to NFC tags for quick and easy clock-ins
With your desktop kiosk running in NFC mode, you can manage NFC tags directly from the kiosk itself. Link new tags, replace existing ones, or remove assigned tags for any members using the kiosk, making it simple to set up your team and get them ready to clock in and out.
If you haven’t set up your desktop kiosk, check out using Kiosk mode on Jibble’s desktop app to get started.
This article covers:
- What you’ll need
- Managing NFC tags
- Assigning NFC tags to members
- Replacing or disconnecting NFC tags
- Clocking in and out using NFC tags
What you’ll need
Before setting up NFC mode on your desktop kiosk, make sure you have the following:
- NFC reader: A compatible NFC reader connected to your computer to scan NFC tags.
- NFC tags: An NFC tag for each member who’ll be clocking in at this kiosk.
Once your NFC reader is connected and your tags are ready, you can assign tags to members and start using NFC mode on your desktop kiosk.
For more details, see our list of recommended NFC readers and NFC tags.
Managing NFC tags
You can assign, replace, and disconnect NFC tags directly from your desktop kiosk while it’s running in NFC mode.
To access NFC tag management:
- Click the gear icon on your kiosk screen.
- Enter your Admin PIN.
- Go to Kiosk details.
- Click Manage NFC tags.
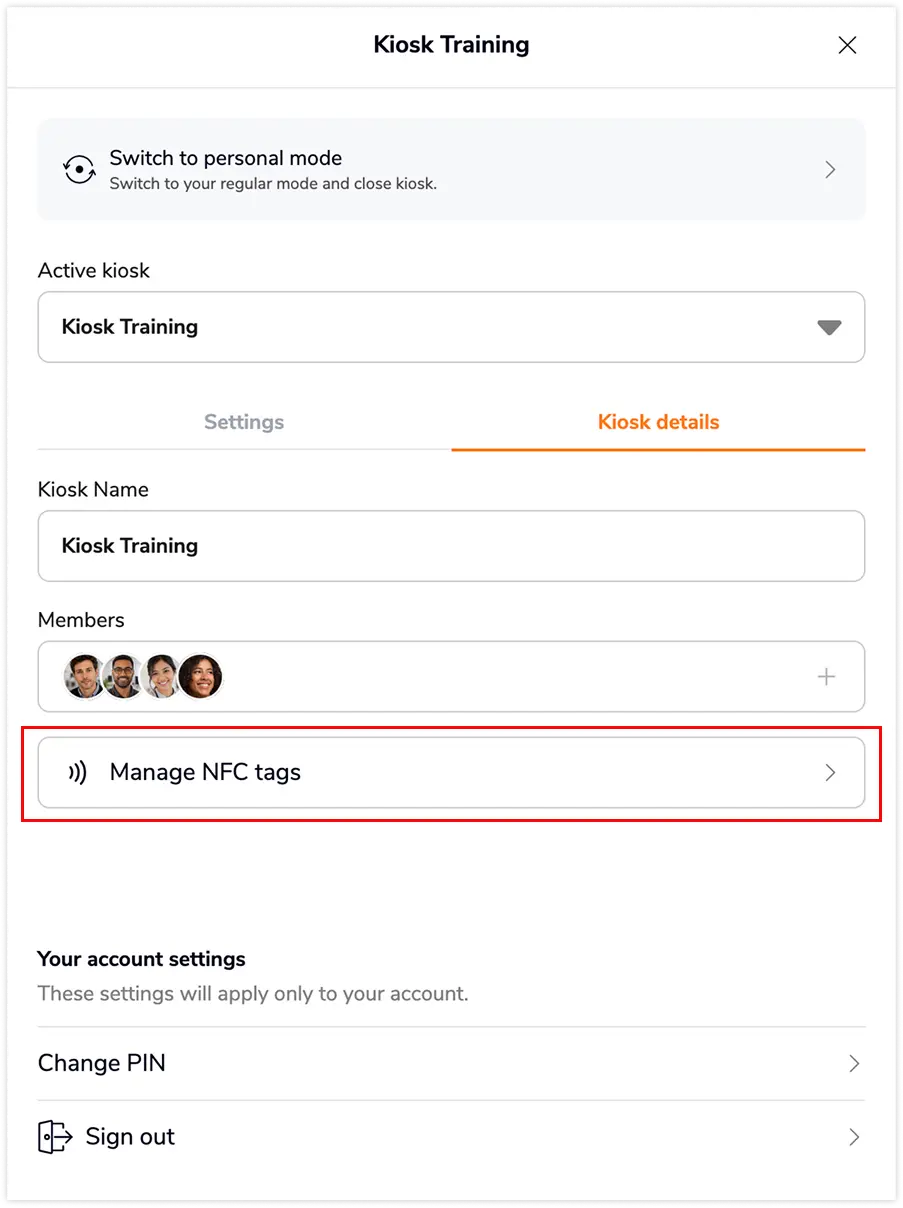
- You’ll see a list of all members assigned to the kiosk, along with their NFC tag status:
- A green NFC tag badge means they’re already linked.
- An Add NFC tag button means they aren’t linked yet.

Note: The Manage NFC tags option is only available when your kiosk is running in NFC mode. If you don’t see this option, check your selected kiosk mode in Kiosk settings.
Assigning NFC tags to members
Each NFC tag must be assigned to a specific member before it can be used for attendance tracking.
To assign an NFC tag:
- Click Add NFC tag next to the member’s name.
- When prompted, tap the NFC tag on your reader.
- A confirmation message appears once the tag is linked.
- After linking a tag, you’ll see an option to Assign next NFC tag for the next unassigned member.
- Click Assign next NFC tag, scan the next tag, and continue until all members have been assigned.
Tip💡: Arrange your NFC tags in the same order as the member list before starting. This makes it faster to assign tags for your entire team.
Replacing or disconnecting NFC tags
You can replace an NFC tag if a member loses their tag or needs a new one. You can also disconnect a tag if it should no longer be assigned to that member.
To replace an NFC tag:
- Click on the edit icon next to the member’s name.
- Click Replace NFC tag.
- Confirm when prompted.
- Tap the new NFC tag on your reader.
To disconnect an NFC tag:
- Click on the edit icon next to the member’s name.
- Click Disconnect NFC tag.
- Confirm when prompted.
- The member’s status will change back to Add NFC tag, and the tag will become available to assign to another member.
Note❗: Once a tag is disconnected, the member will not be able to clock in or out using an NFC kiosk until a new tag is assigned.
Clocking in and out using NFC tags
Once NFC tags have been assigned, members can use them to clock in and out at the desktop kiosk:
- Tap your assigned NFC tag on the NFC reader.
- Confirm any required information, such as activities or projects.
- Complete the clock-in or clock-out process.