How do I track time in Gmail?
Incorporate time tracking seamlessly into your Gmail workflow to enhance productivity and accurately track hours spent on email tasks
Leverage Jibble’s Chrome time tracking extension in Gmail to monitor and record your email-related work hours with ease. Whether you’re looking to monitor the hours spent on email tasks, enhance your productivity, or streamline client billing, this article provides step-by-step instructions on incorporating time tracking seamlessly into your Gmail workflow.
This article covers:
Installing Jibble’s Chrome extension
- You can install the Jibble extension:
- Through the Jibble Web App:
- Log in to your Jibble account and click on the Get the app button on your dashboard.

- From the pop-up, select Chrome Extension to be directed to the Chrome Web Store page.

- Log in to your Jibble account and click on the Get the app button on your dashboard.
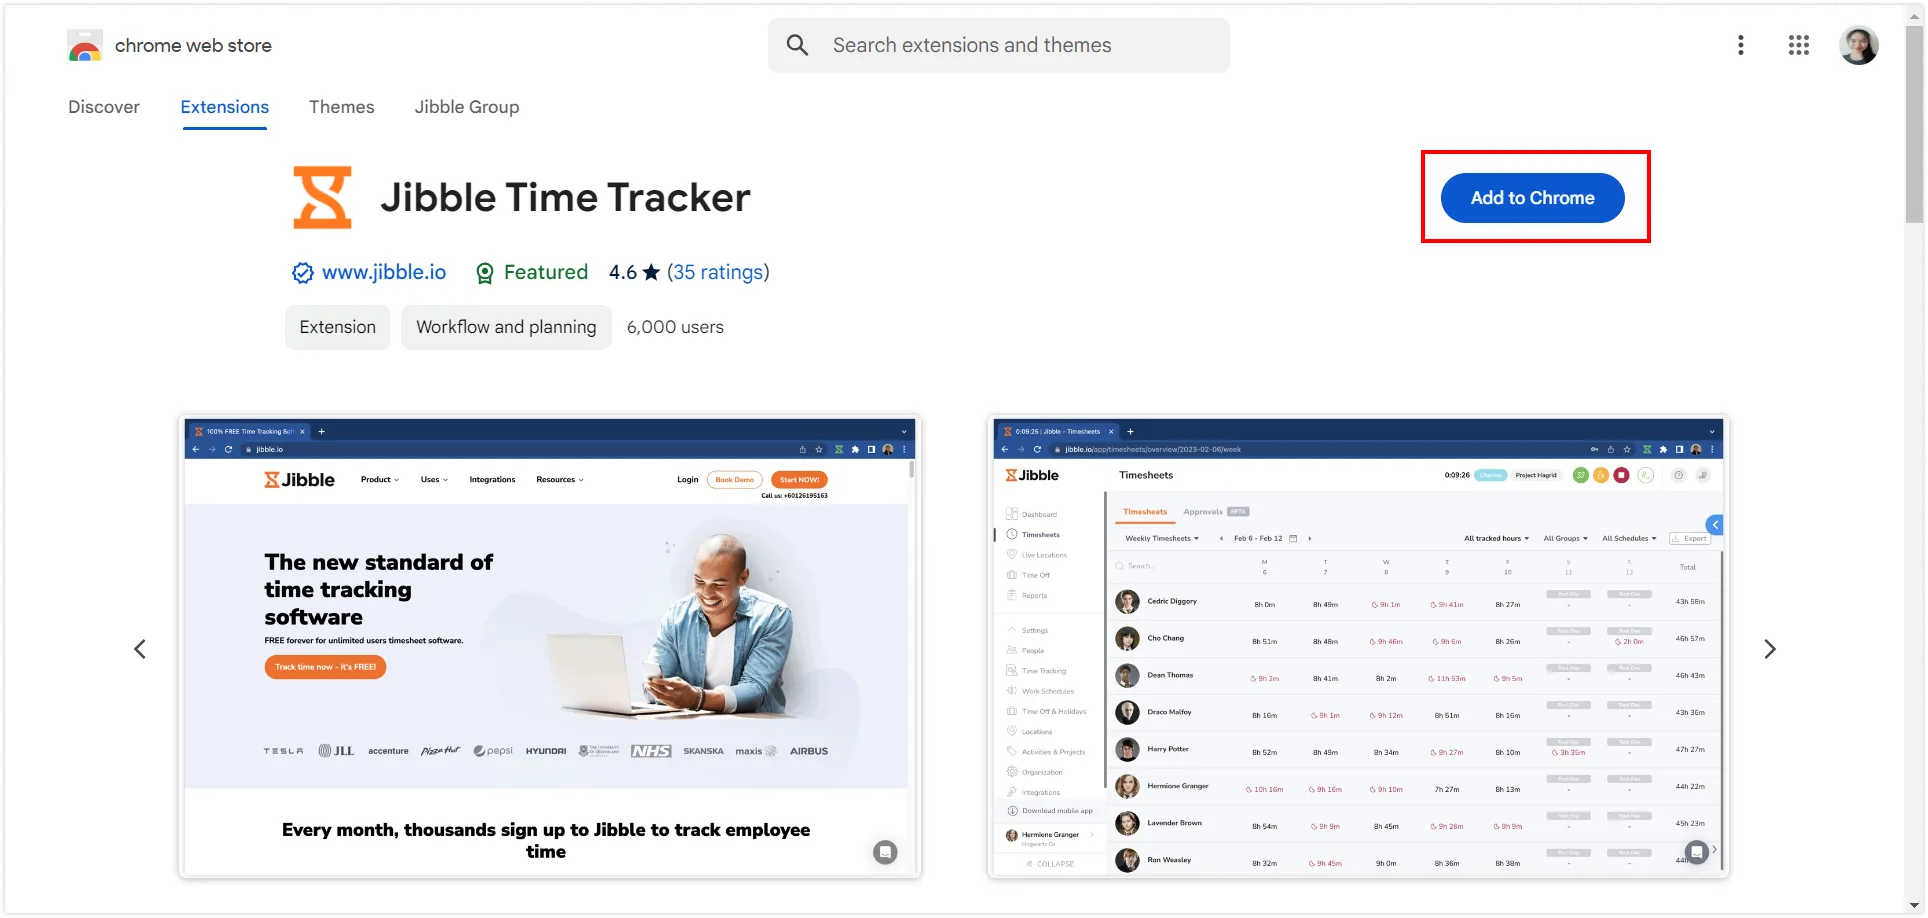
- Directly from the Chrome Web Store:
- Visit the Chrome Web Store and search for Jibble Time Tracker.
- Through the Jibble Web App:
- Click the Add to Chrome button to install the extension.
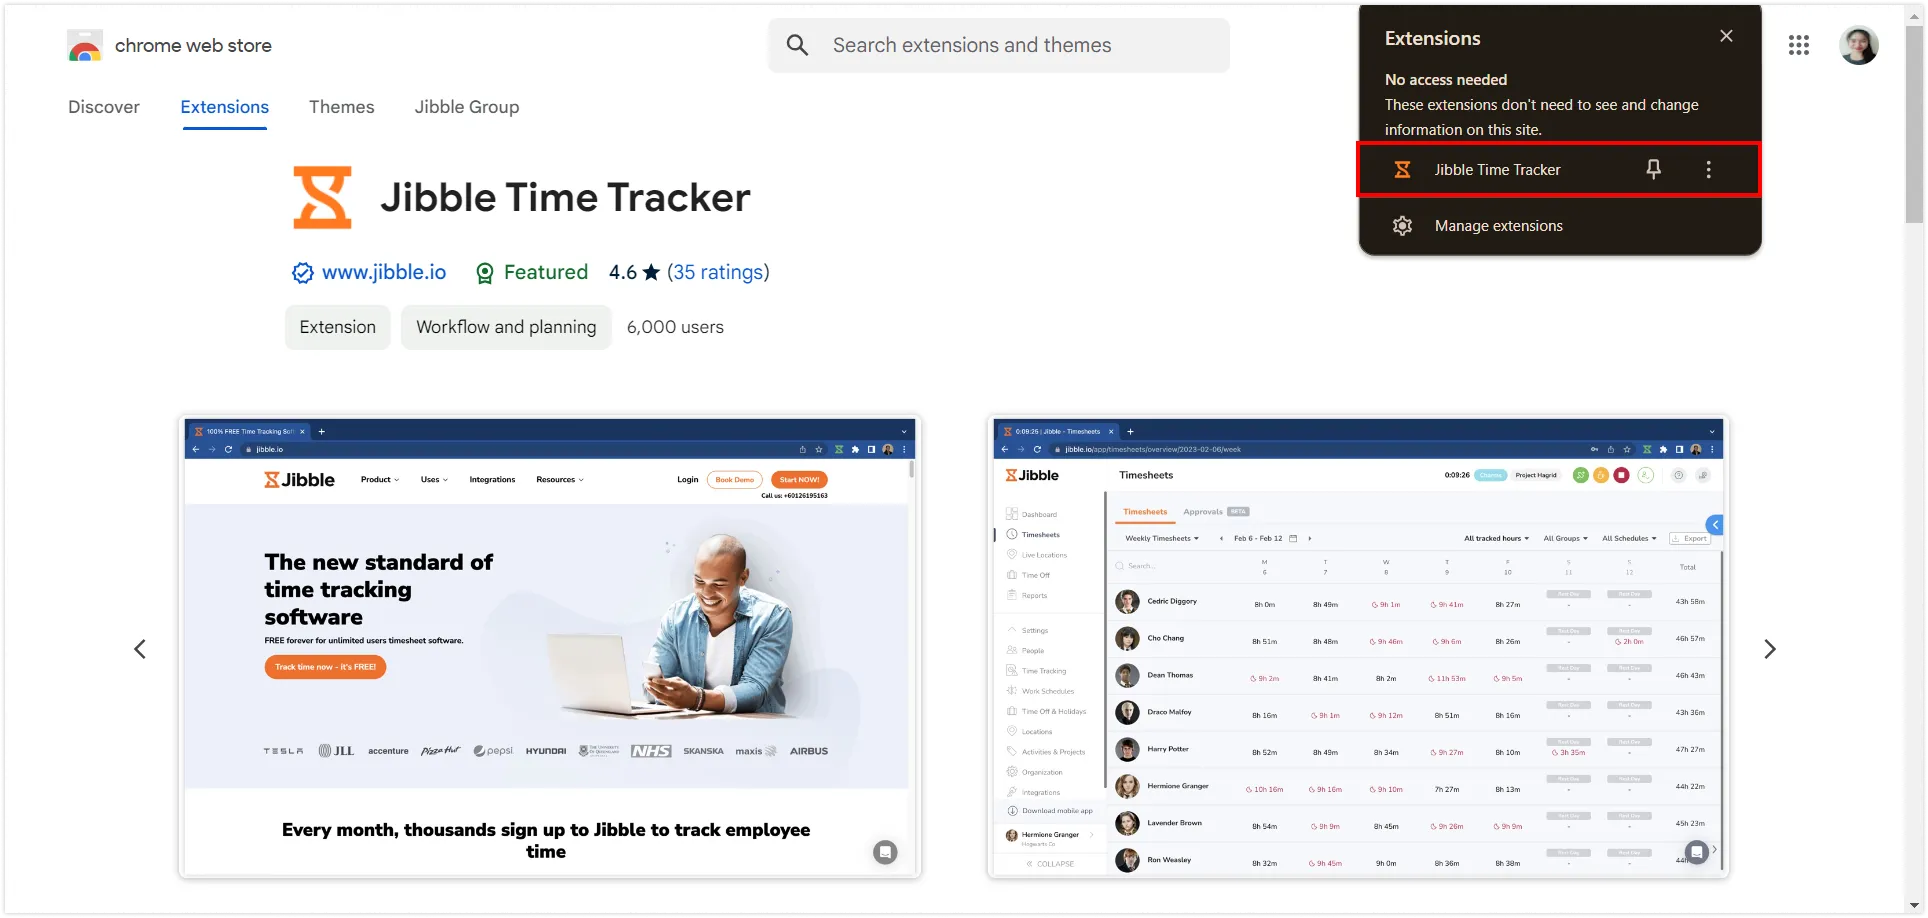
- Once installed, an icon for the extension will appear in your browser’s toolbar.
- Click the puzzle piece icon in the top right of your Chrome toolbar to access the extension.
- Pin the Jibble’s Time Tracker by clicking the pin icon next to it, so it’s easily accessible while using Gmail.
Linking Gmail and Jibble
- Click on the Jibble icon in your Chrome toolbar.
- Log in to your existing Jibble account, or if you’re new to Jibble, sign up for a free account.
- Click on the three horizontal lines located in the upper-right corner of the extension.
- Choose Integrations from the menu.
- Ensure the checkbox for Gmail is enabled.

Tracking time in Gmail
After successfully installing and integrating Jibble’s time tracking extension with Gmail, you’ll be able to track time directly within Gmail through a range of methods.
-
Using the Jibble timer
- Open up Gmail and log in to your account.
- Navigate to the email you want to track time for.
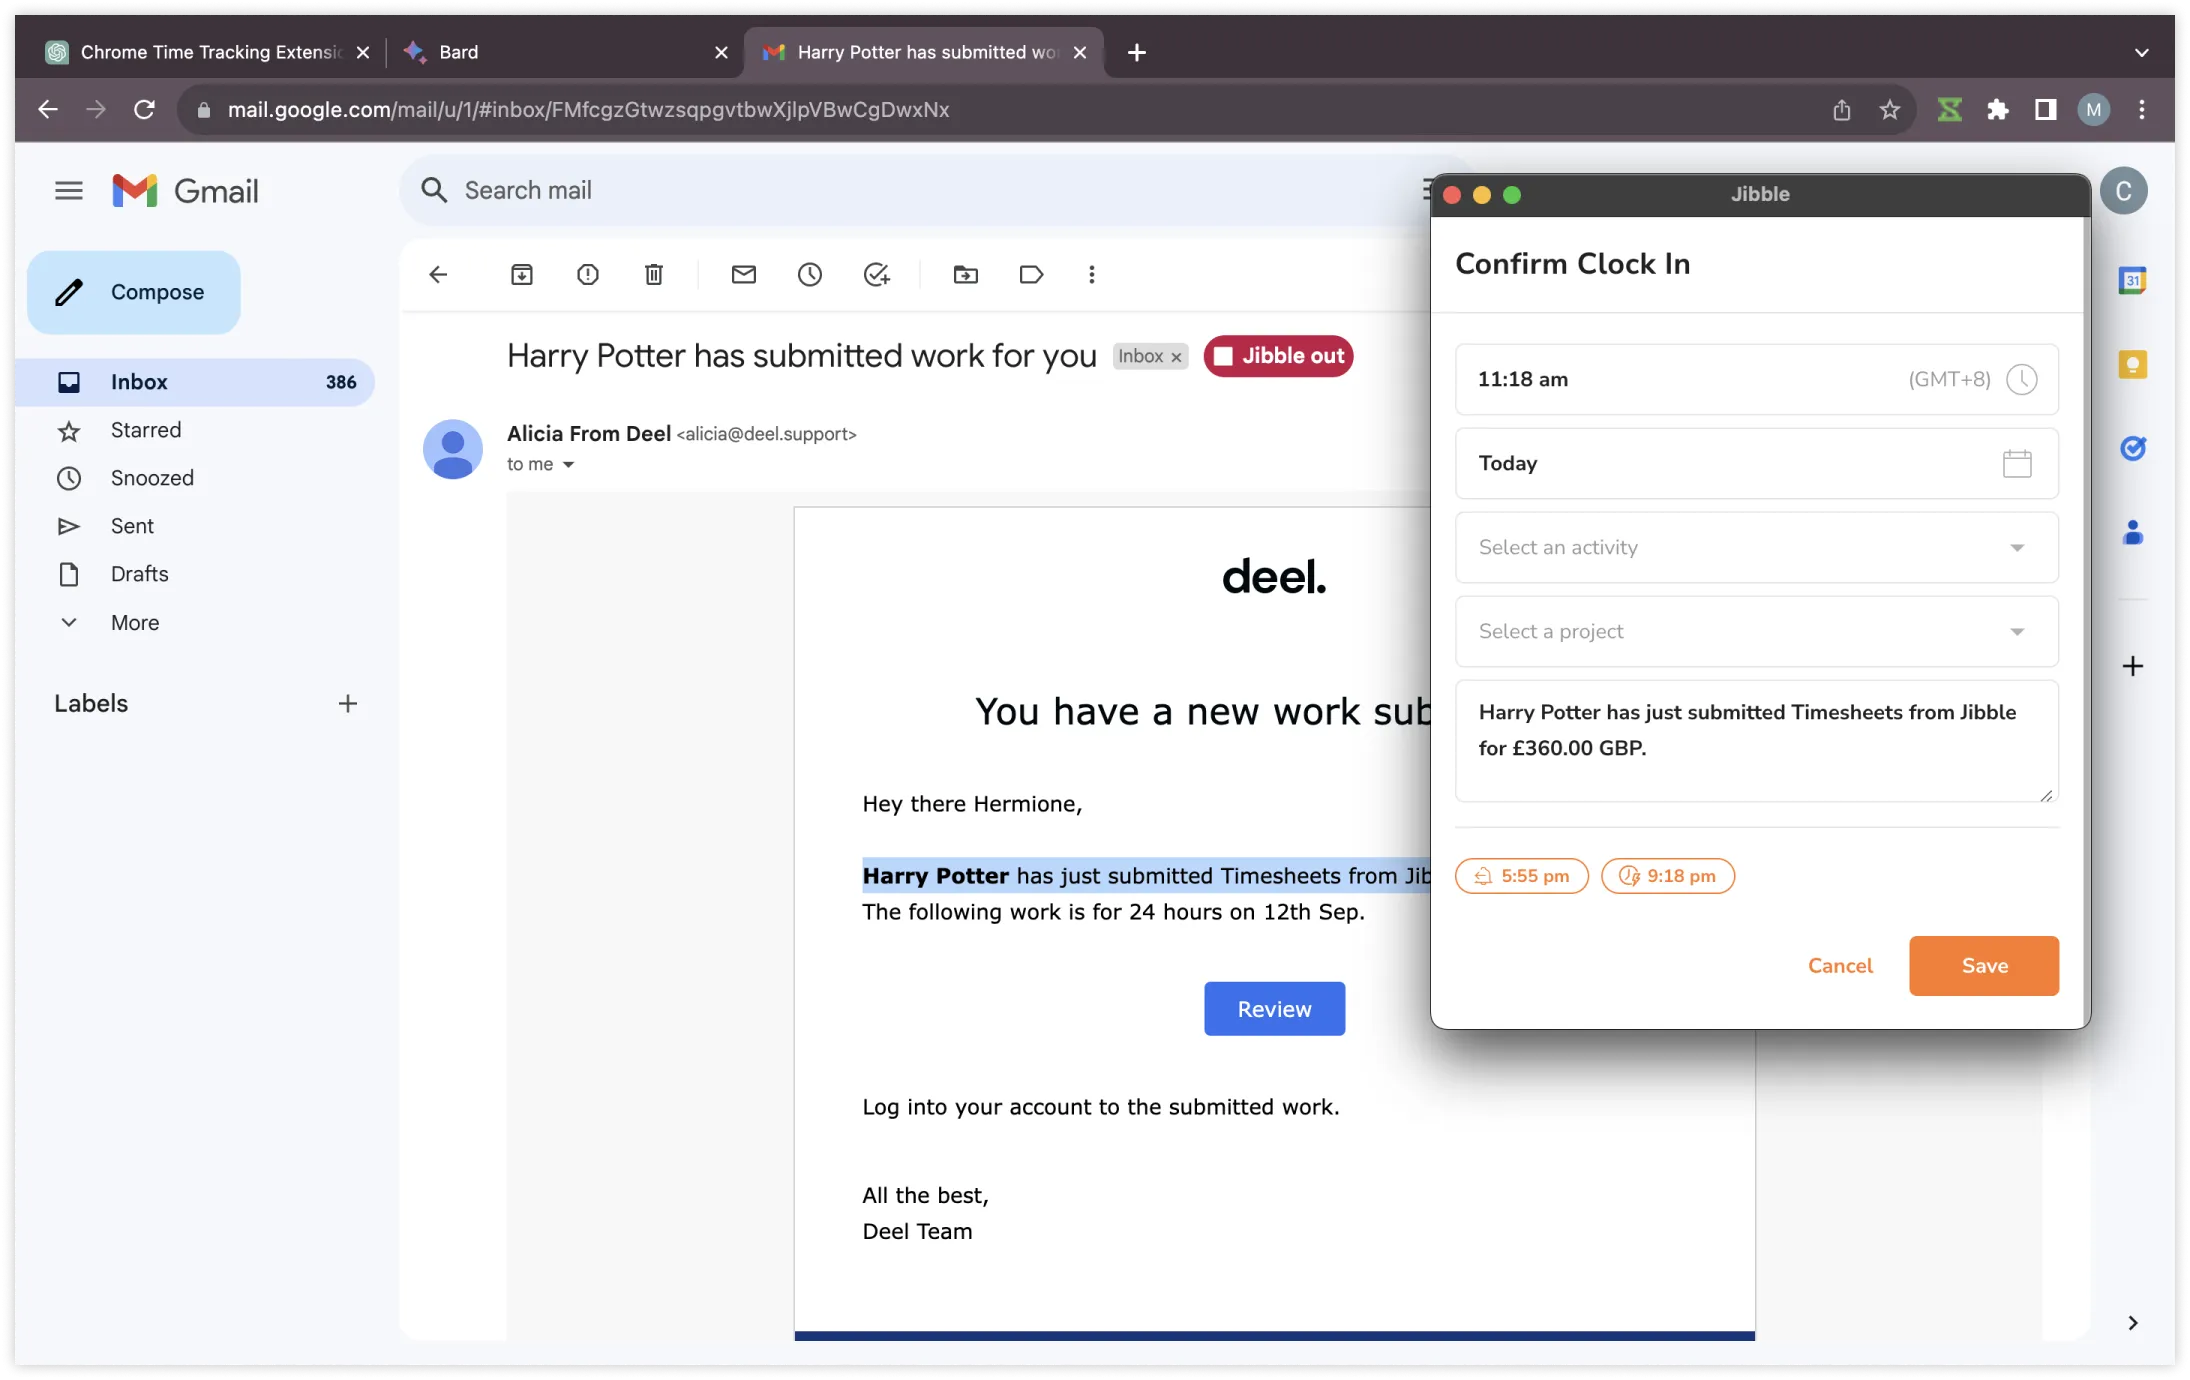
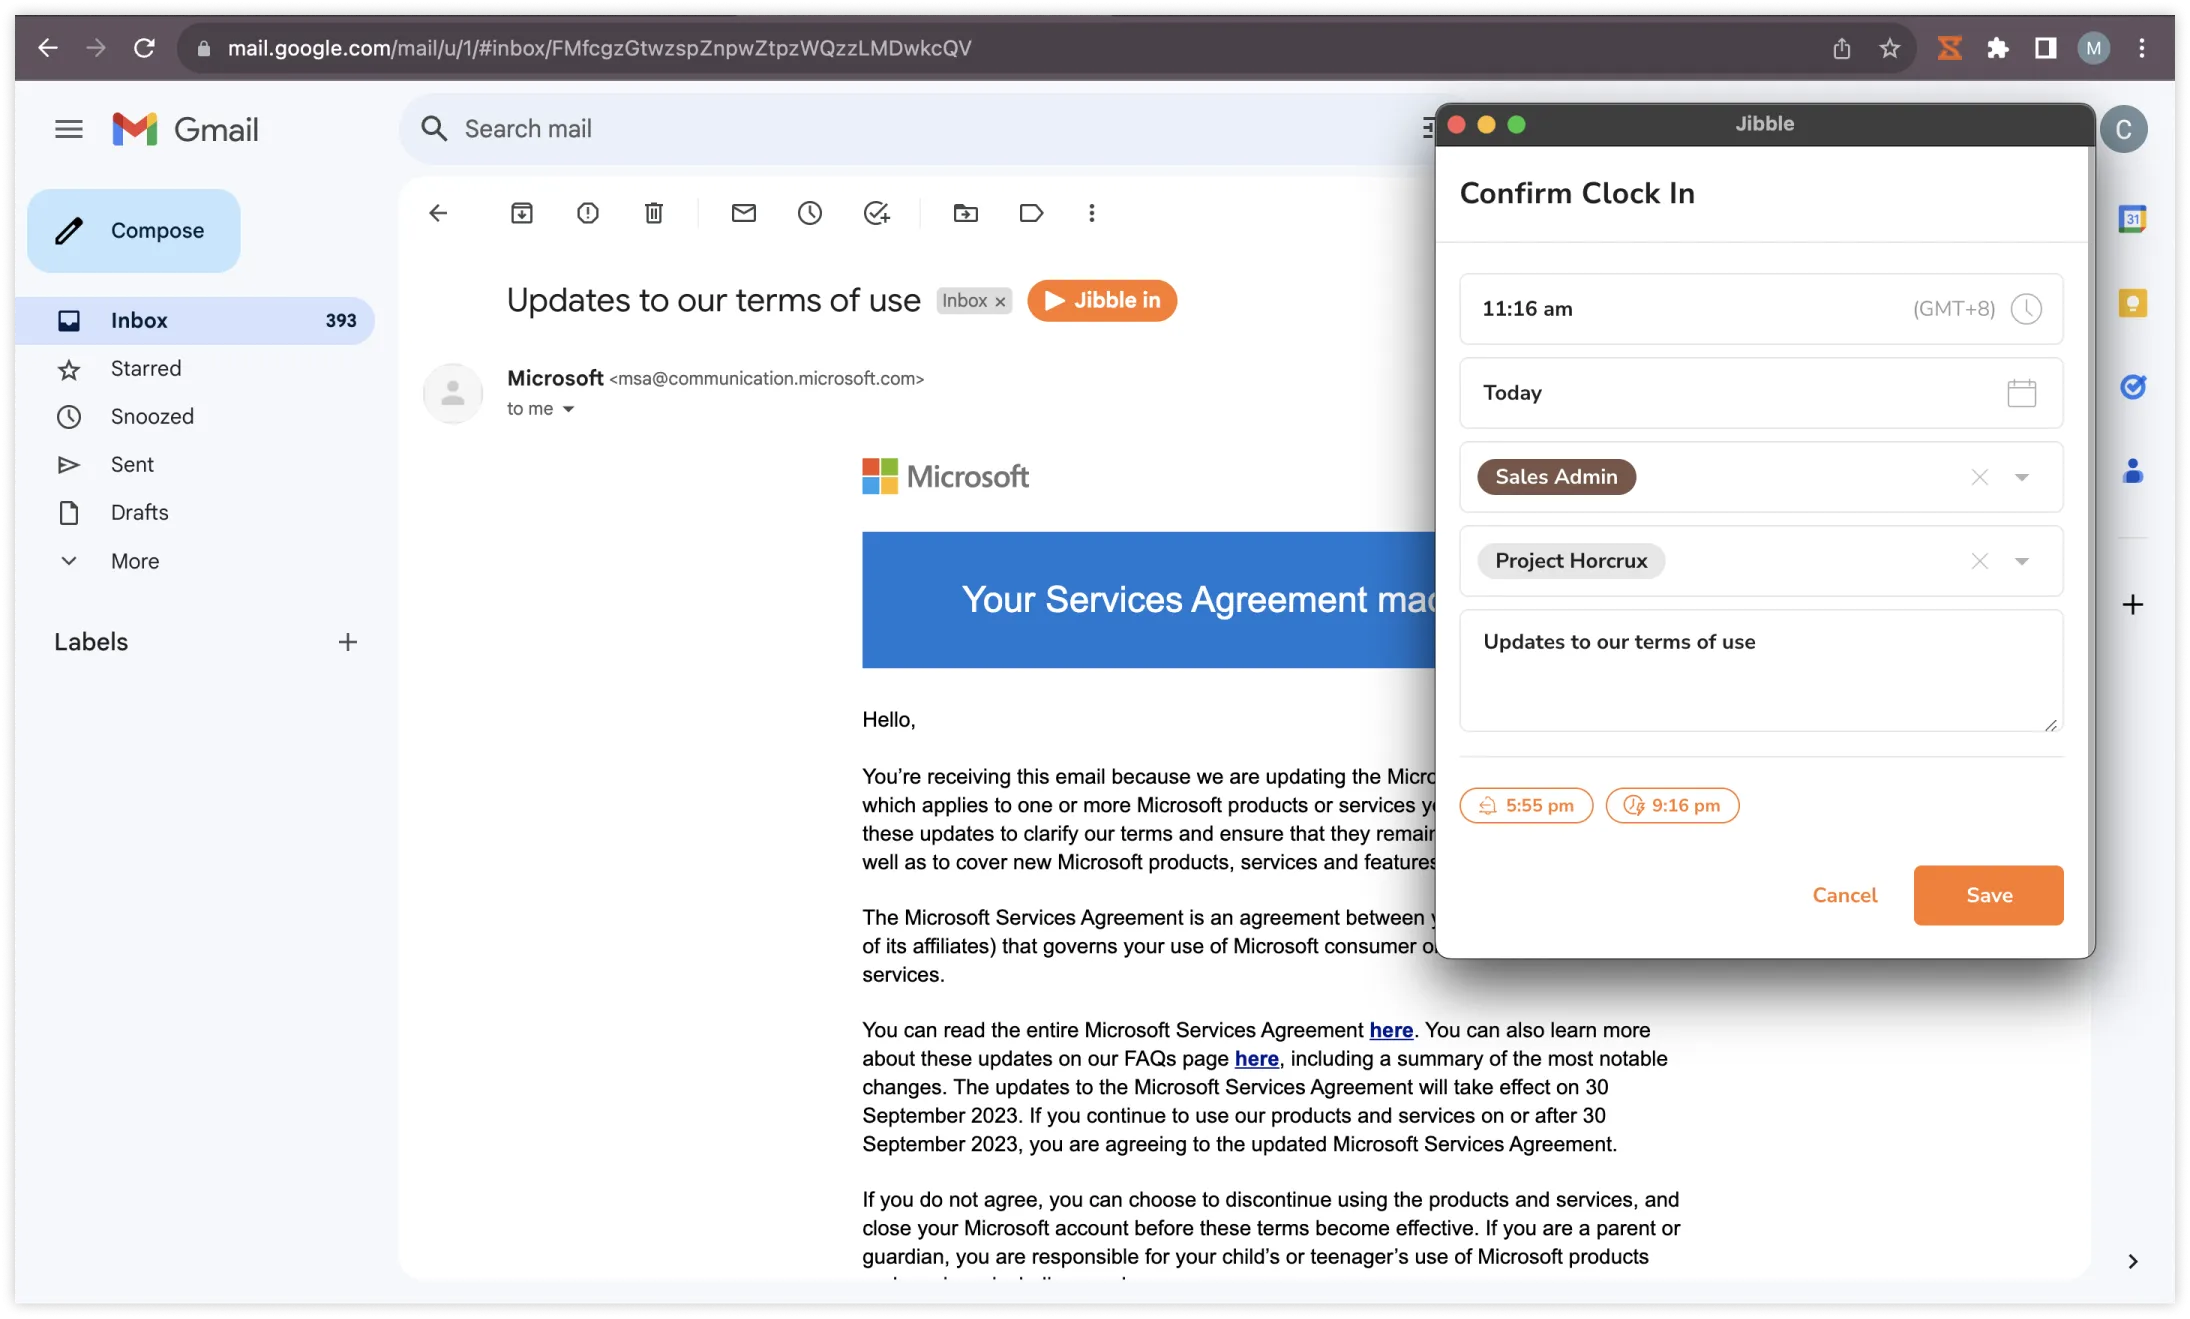
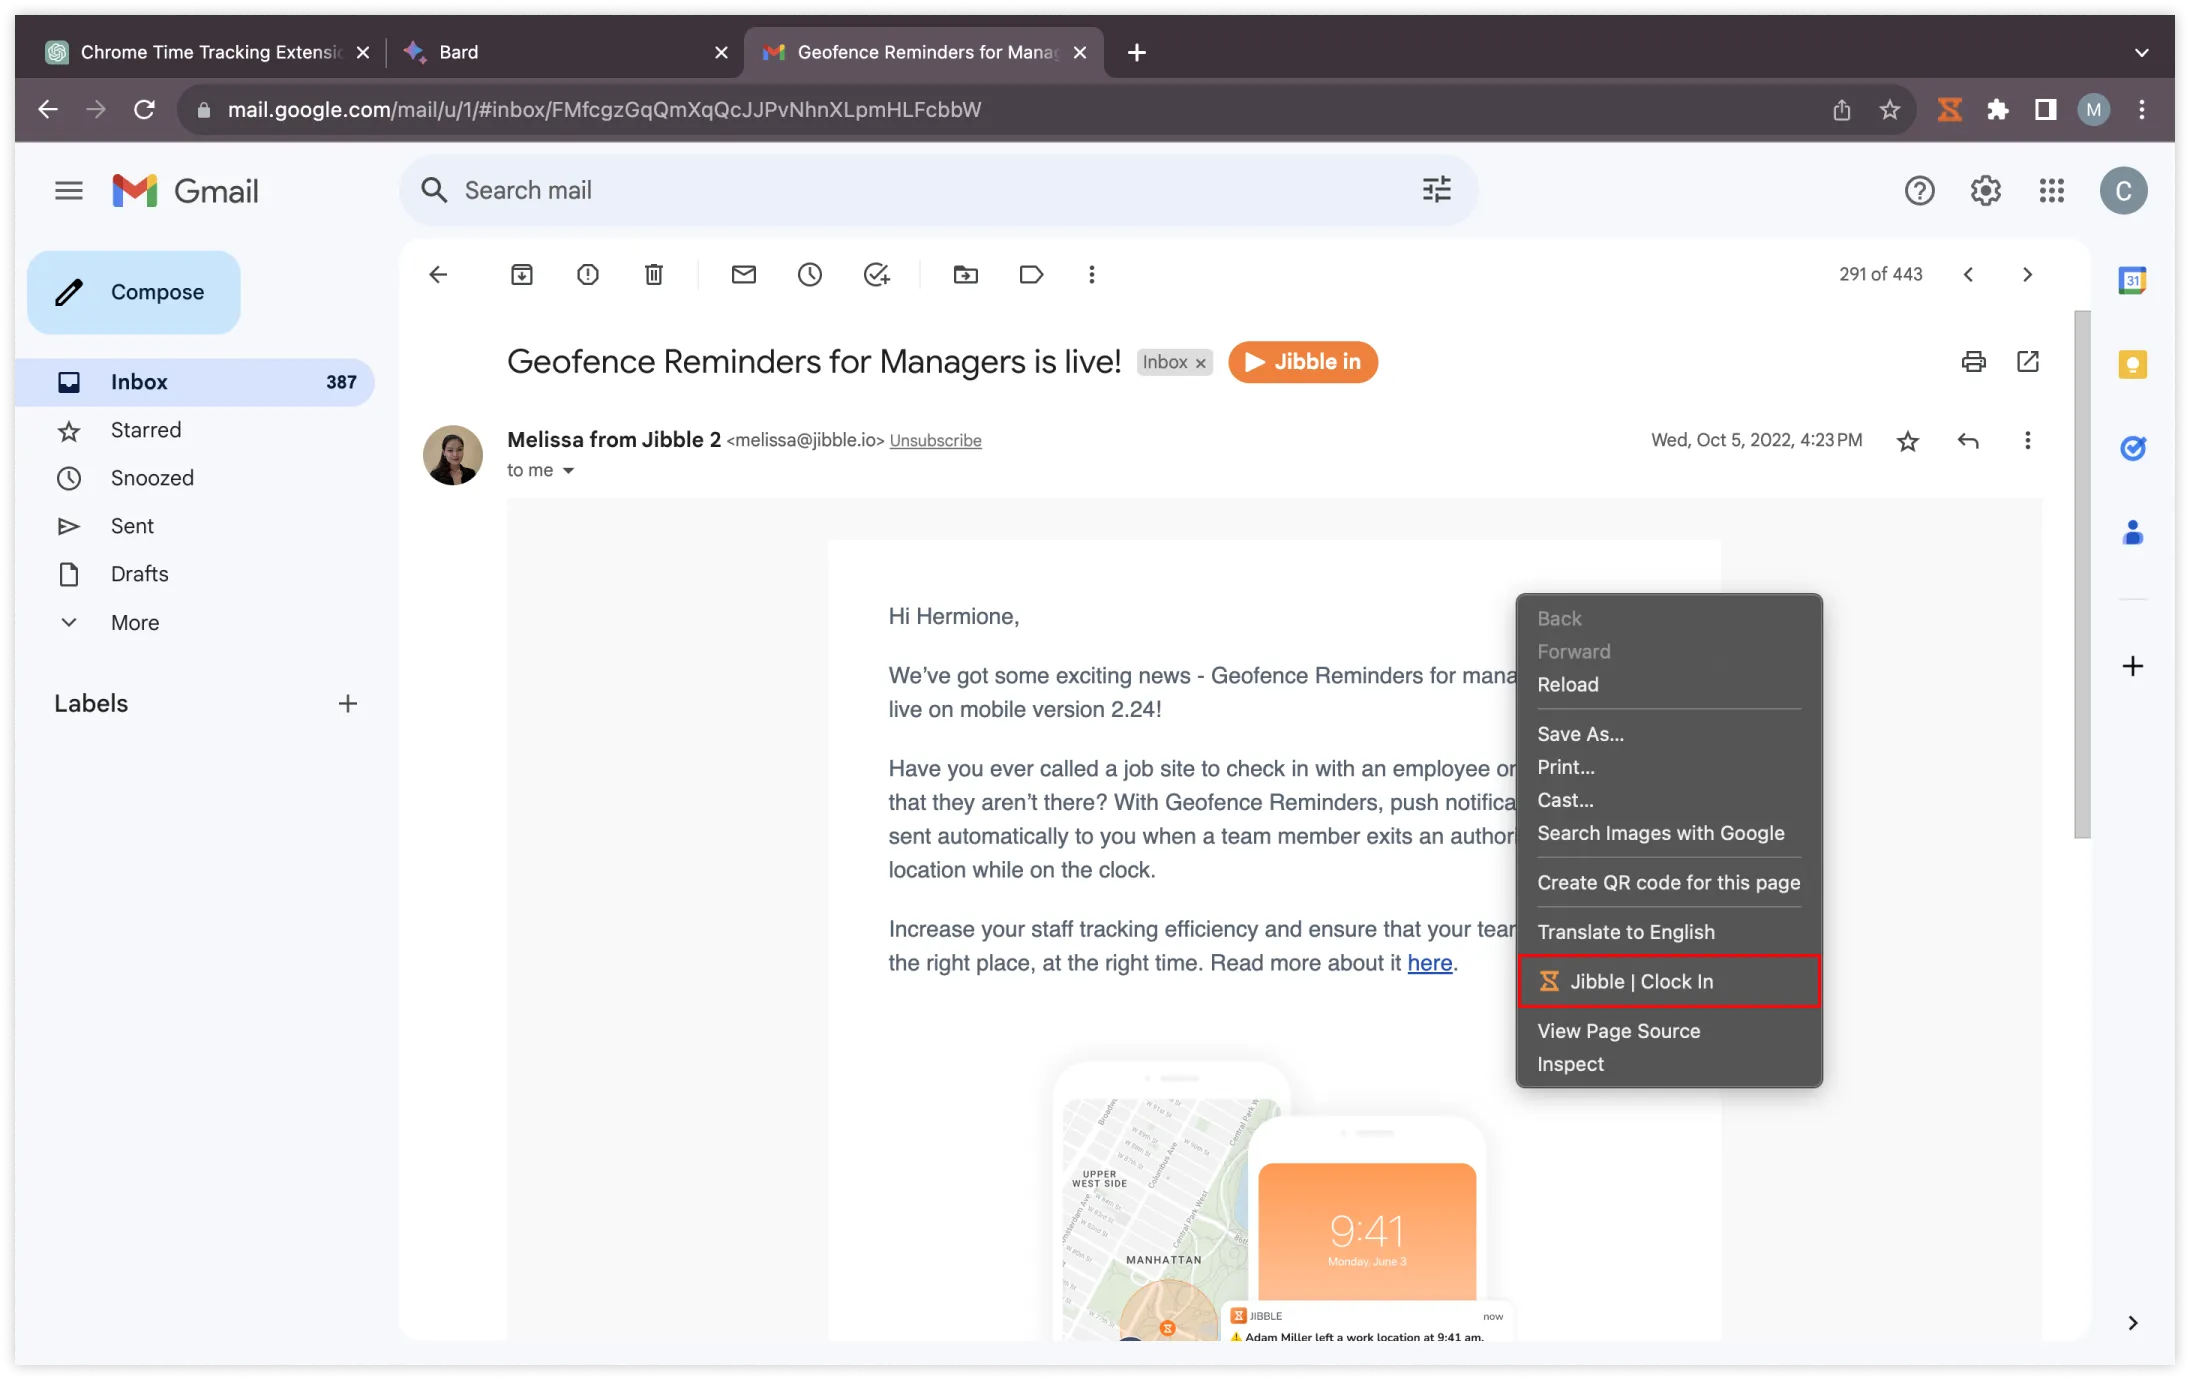
- Within the email interface, you’ll find a Jibble in button.
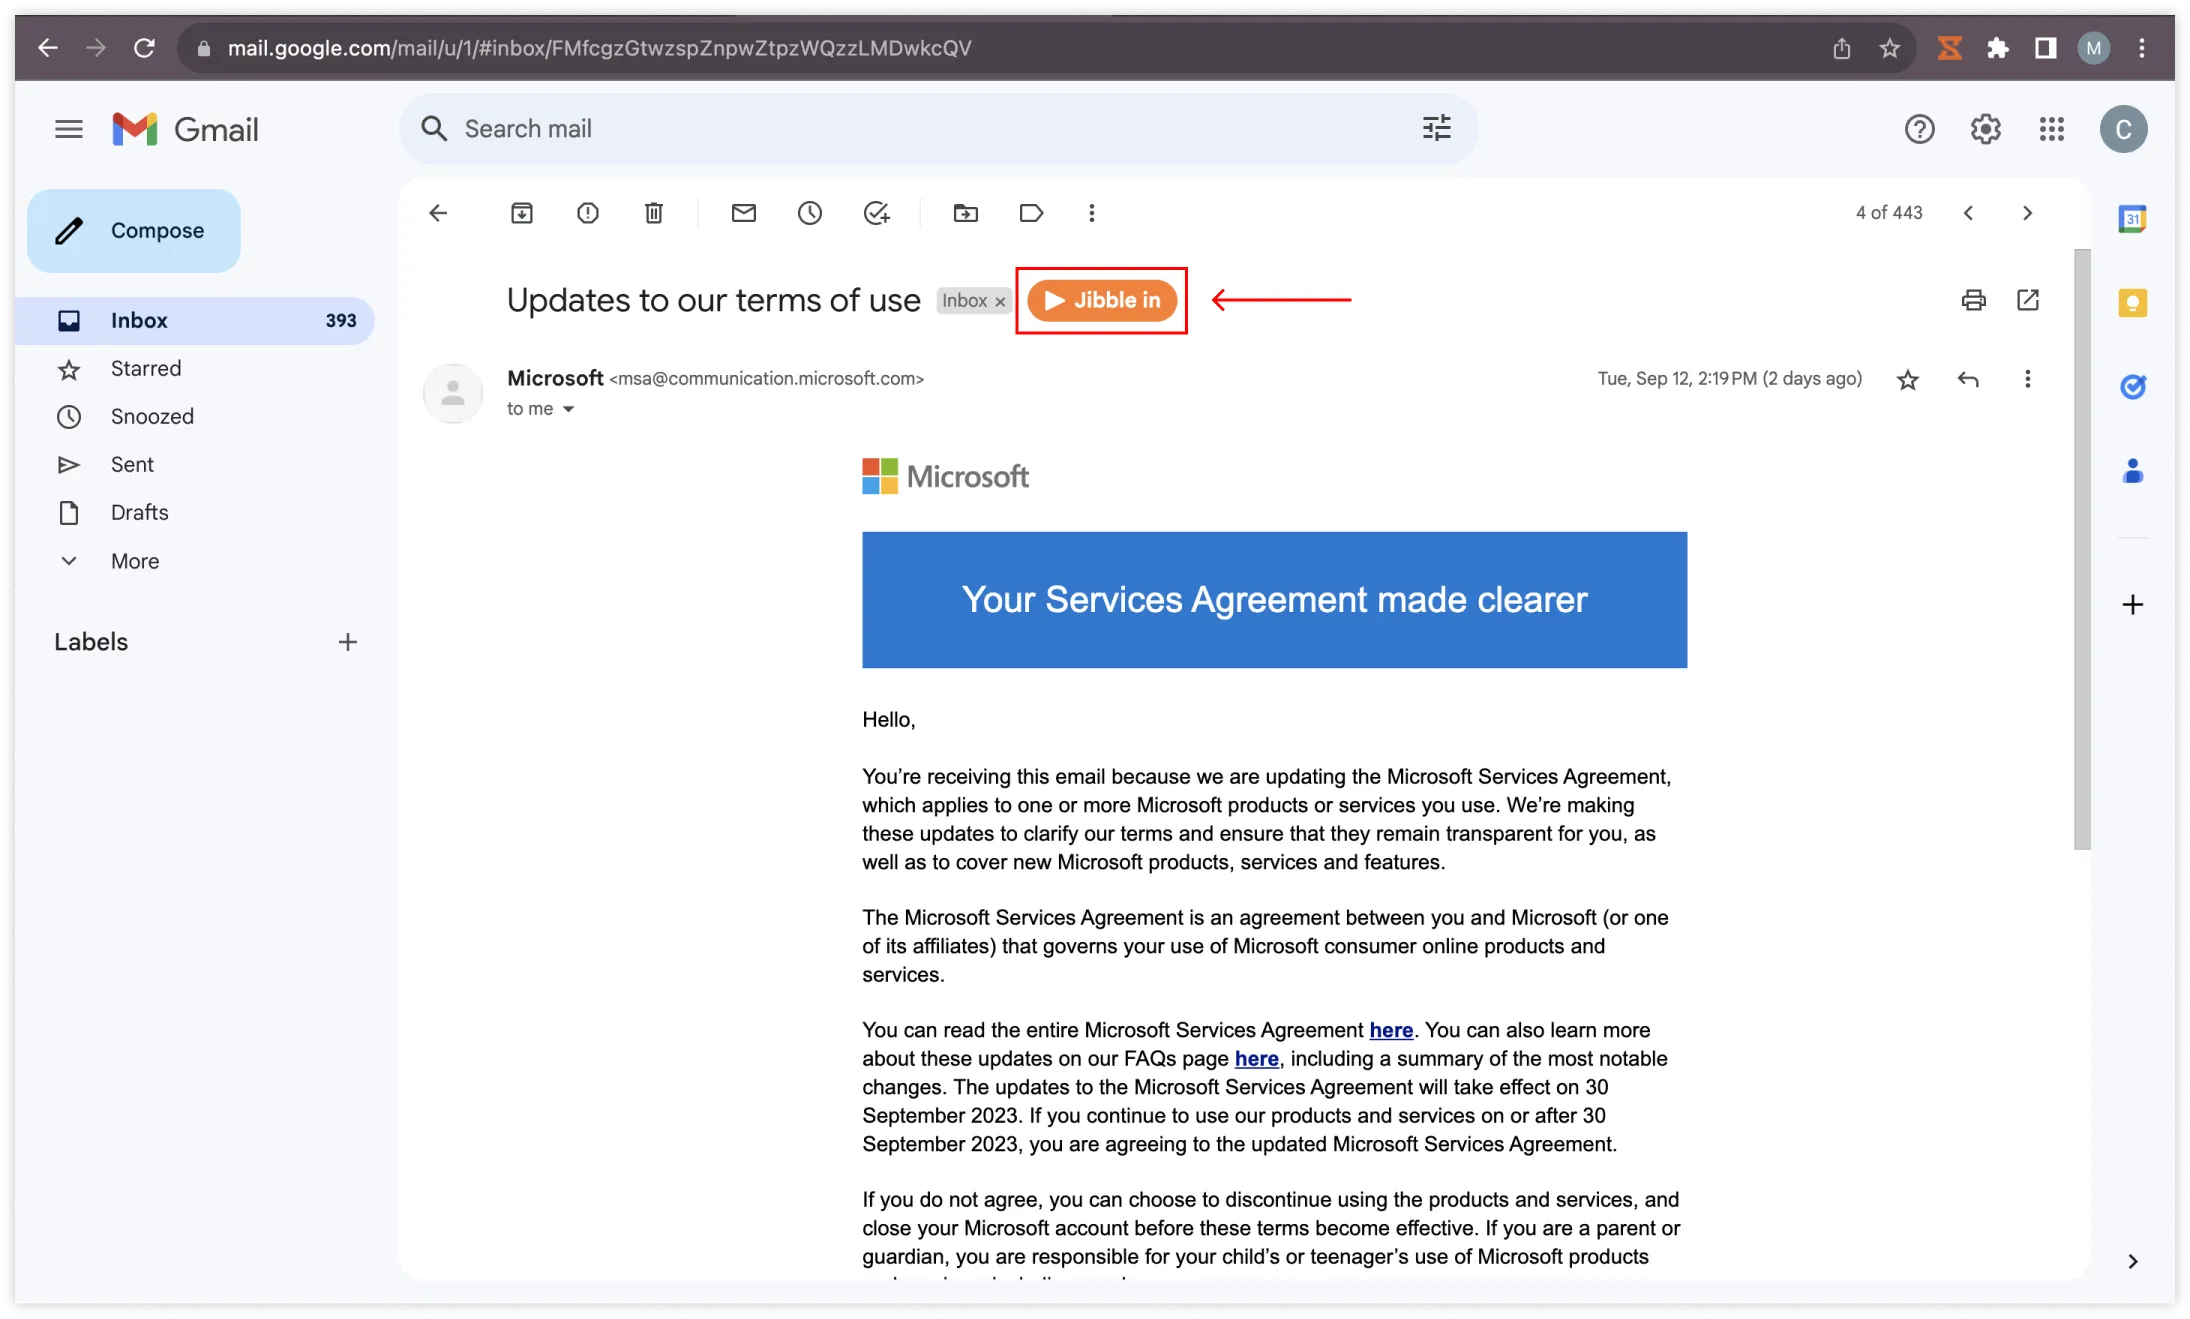
- Click on the Jibble in button.
- A small pop-up window will appear, allowing you to choose an activity and project if necessary.
- Notes will be auto-populated based on the email subject.
- Click Save to start the time.
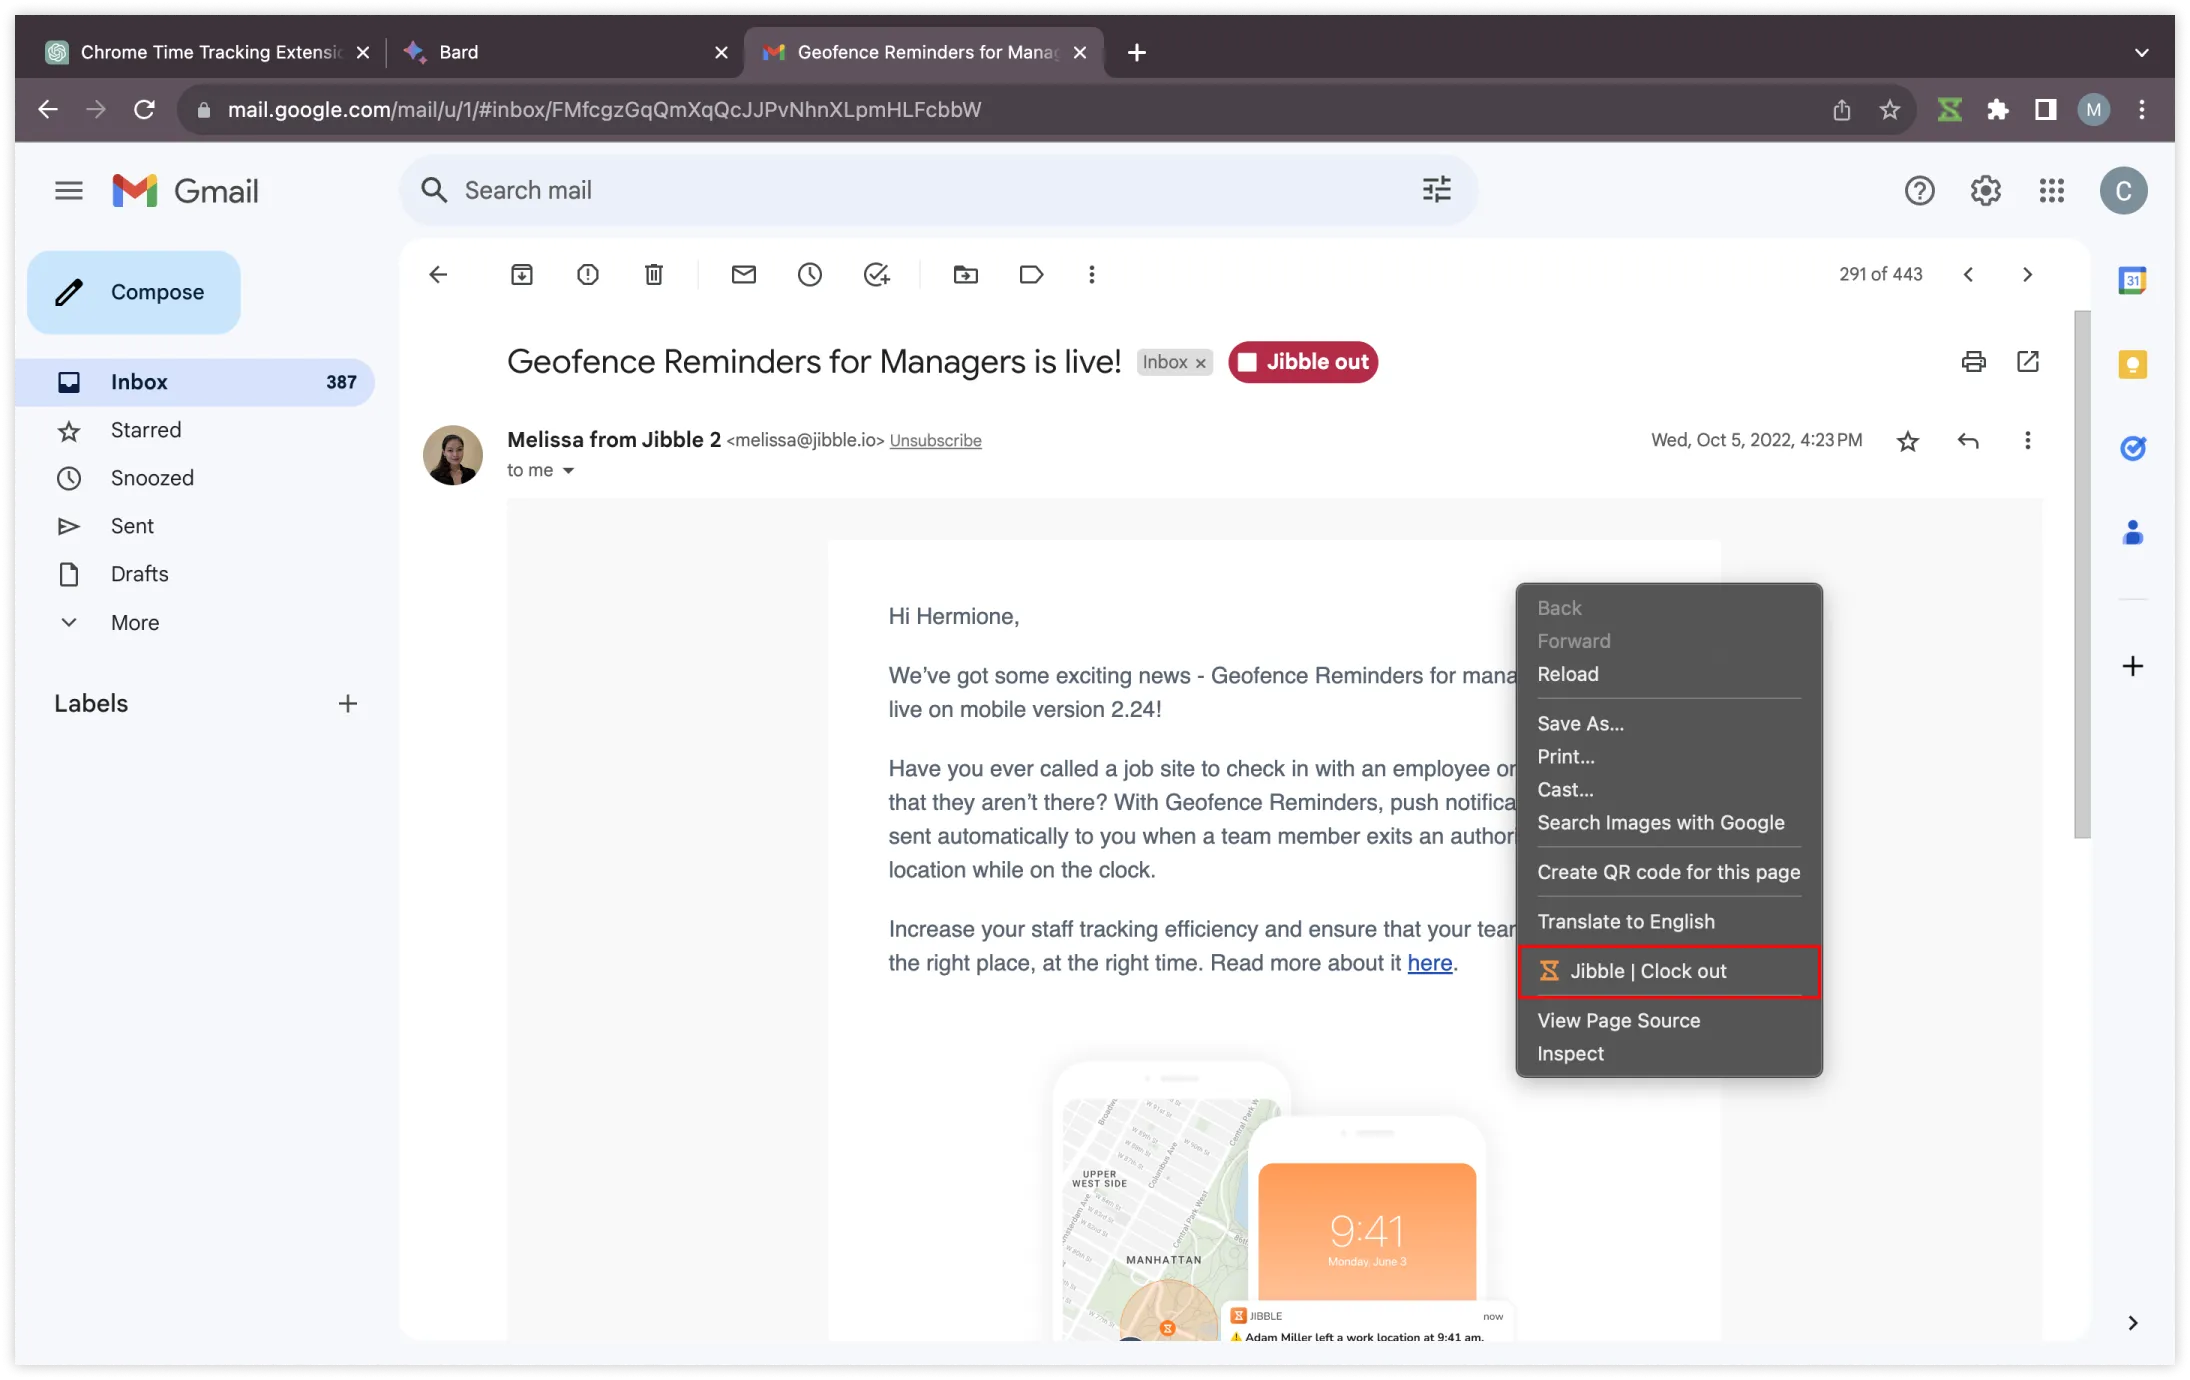
- Once your time tracking session begins, the timer button will automatically change to “Jibble out.”
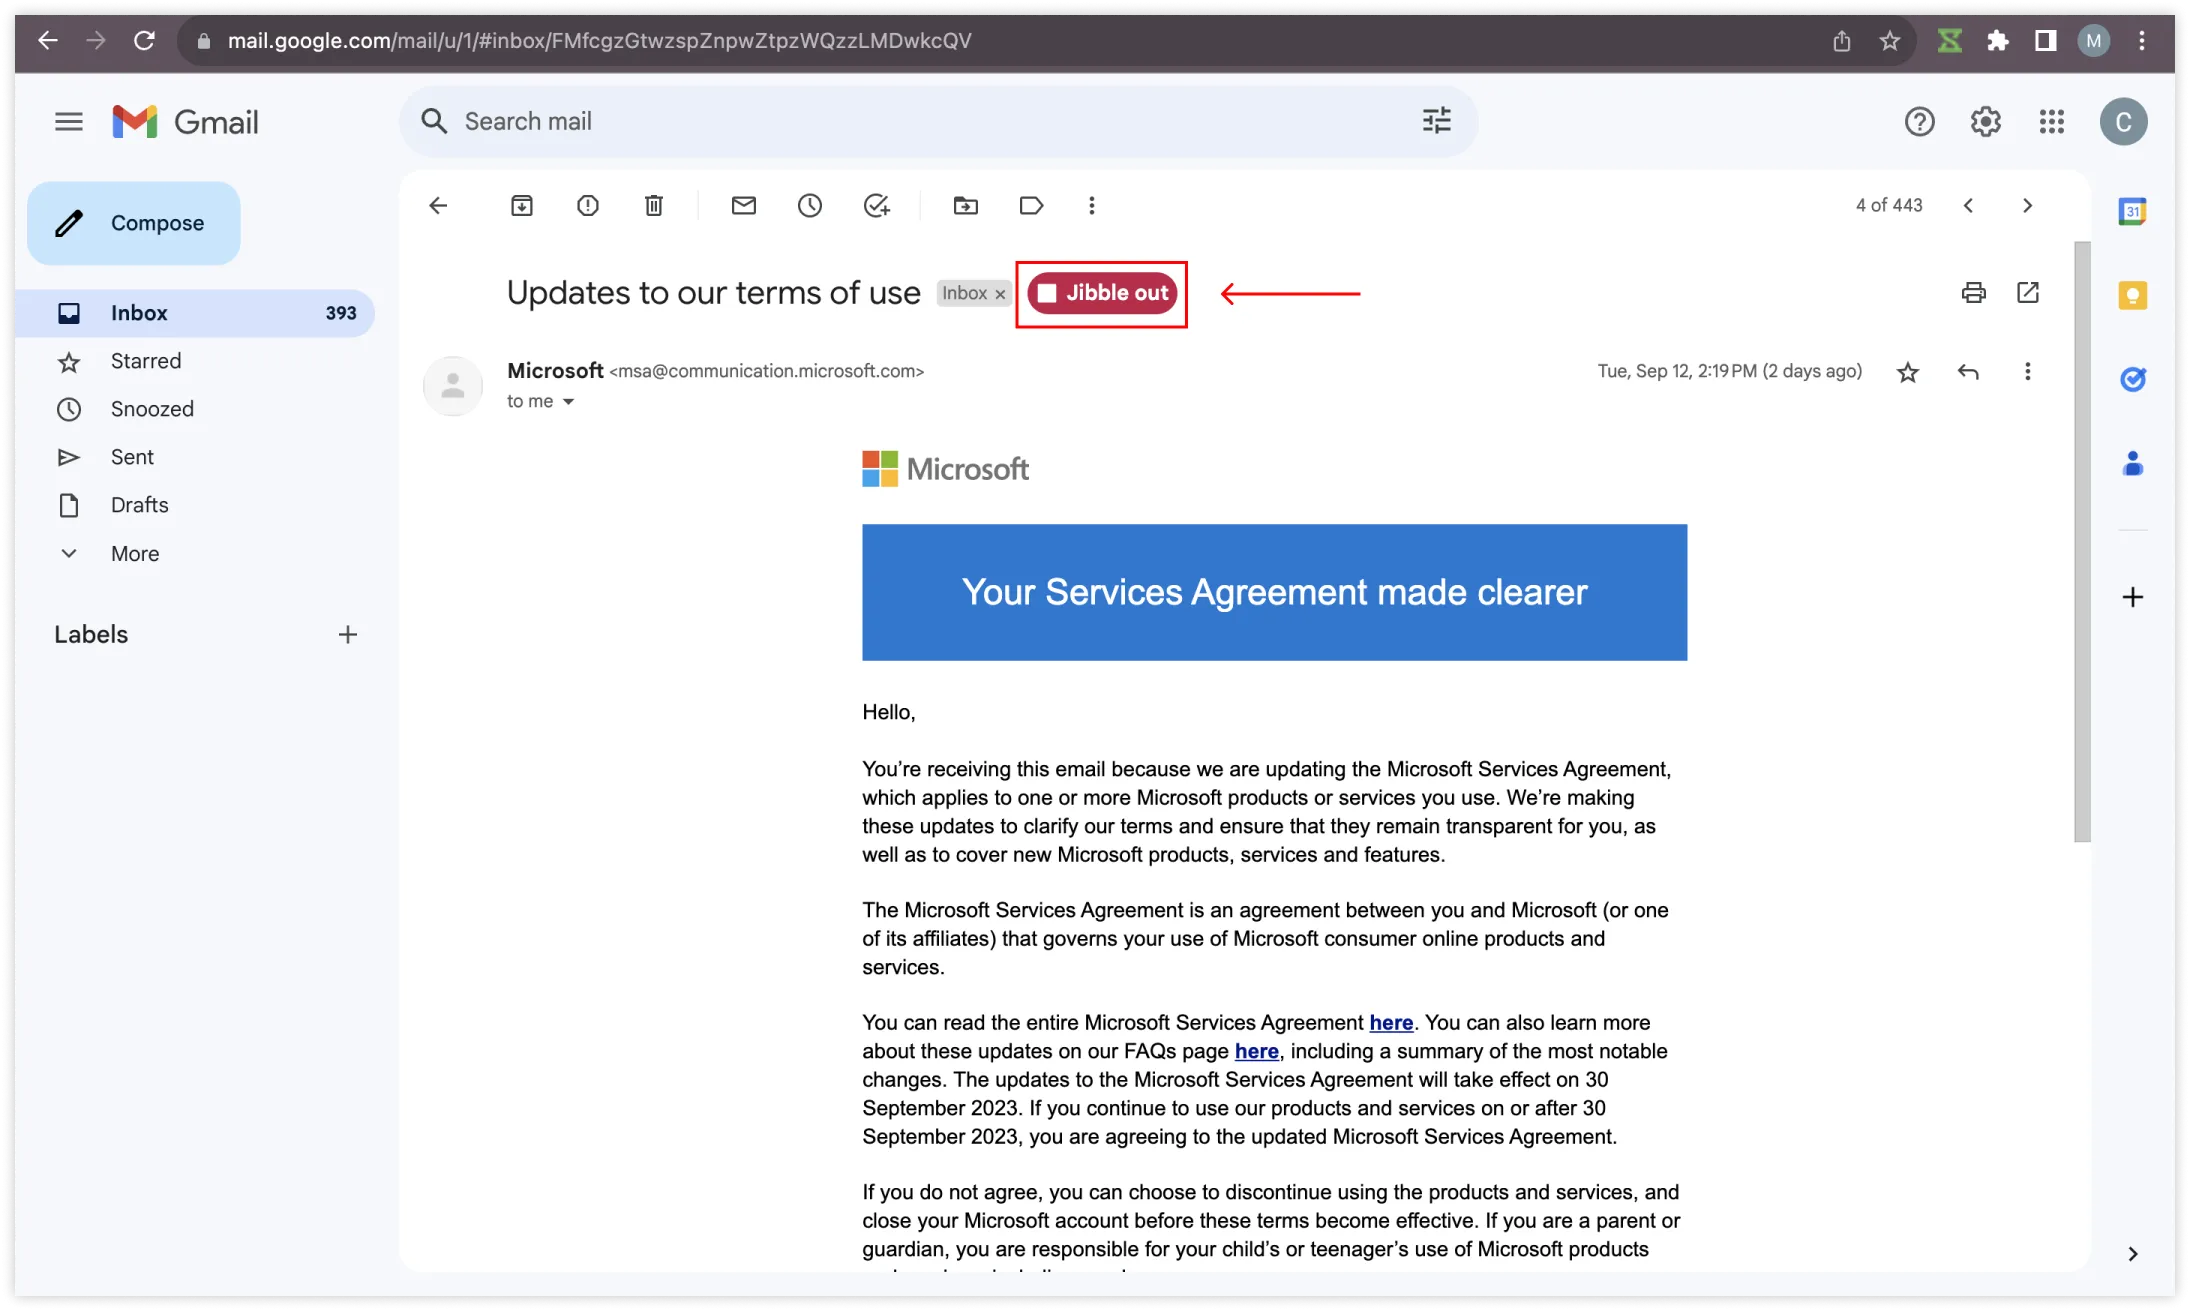
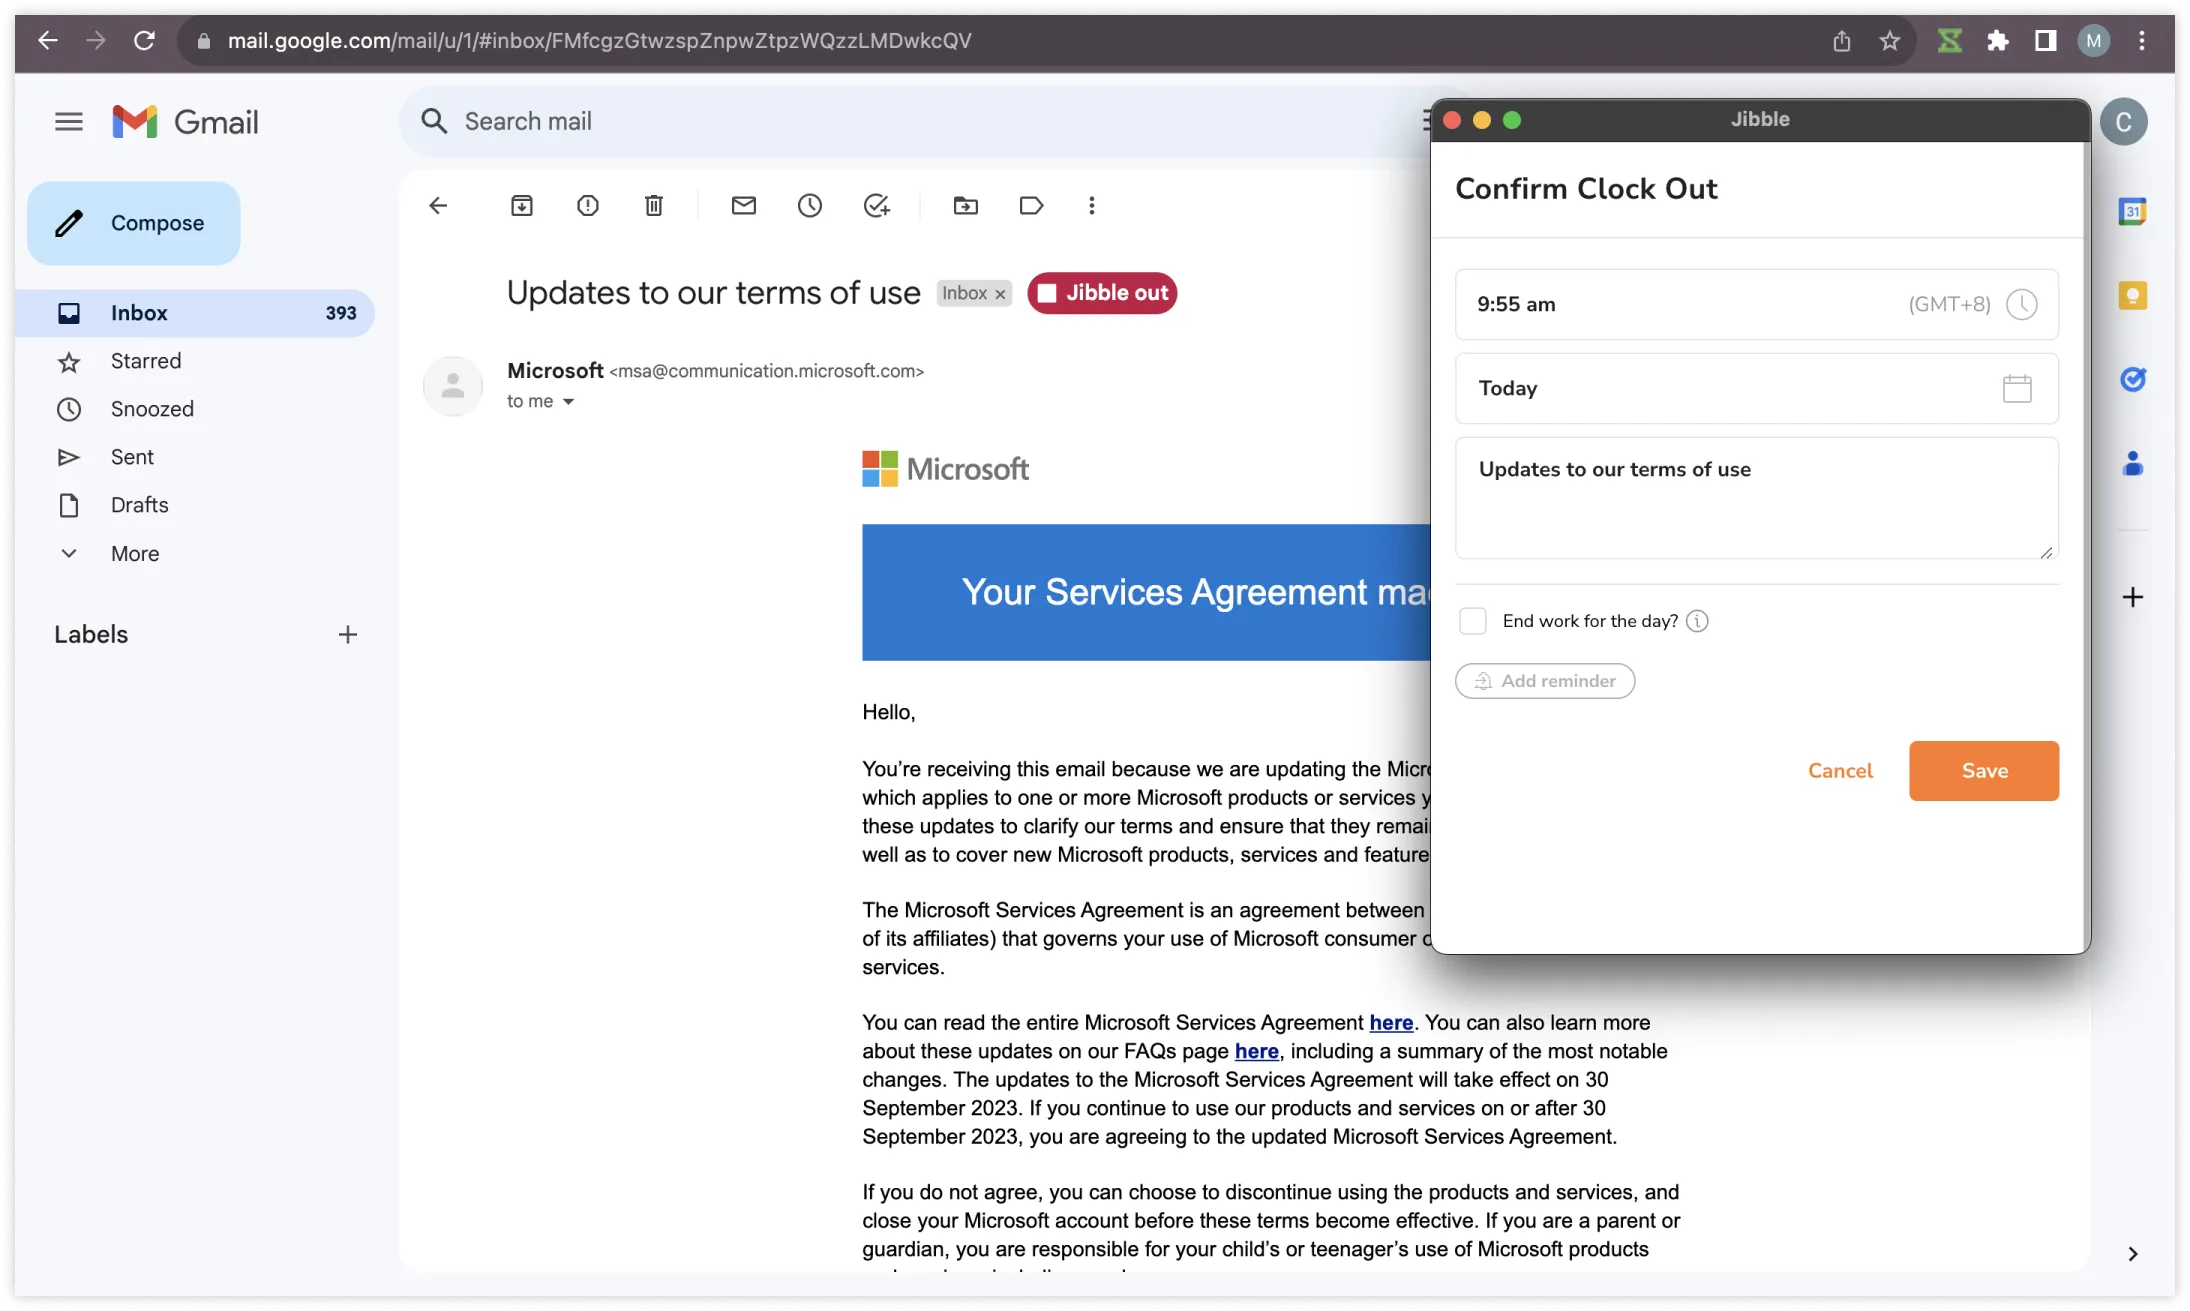
- When you’ve finished with your email task, tap on the Jibble Out button to clock out.
-
Using keyboard shortcuts
- Click on the Jibble icon located in your browser’s toolbar.
- Navigate to the top-right corner and click on the three horizontal lines.
- Tap on Settings.
- Enable the toggle for Keyboard Shortcuts.
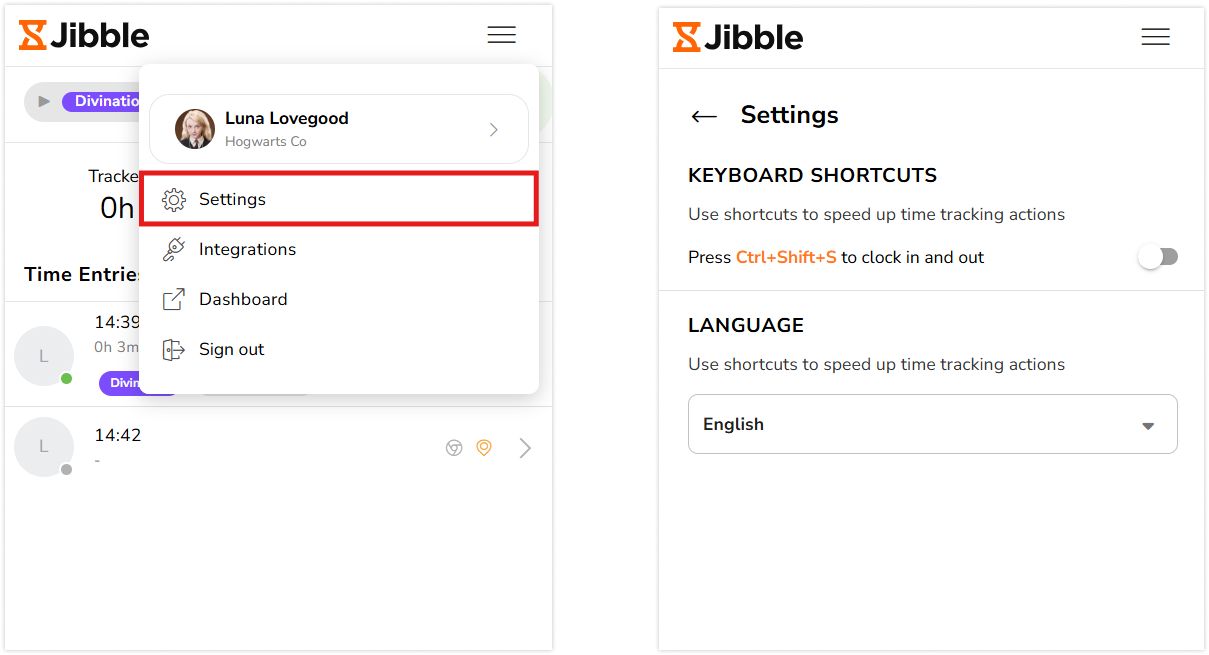
- Once activated, use the keyboard shortcut Ctrl+Shift+S on Windows or Command+Shift+S on Mac to clock in.
- When your task is completed, use the same keyboard commands to clock out.
Note: Previously used activity and project (if applicable) will be automatically applied when using keyboard shortcuts. Note that there will be no need to input additional notes.
-
Using right clicks
- Right click on your mouse and select Jibble | Clock in from the menu to start tracking time.
- Once finished with your task, right click on your mouse again and select Jibble | Clock out to stop the timer.
Note: Previously used activity and project (if any) will be automatically tagged when using the right click functionality. There won’t be any input for notes.
-
Using text highlighting
- Open up an email you want to track time for.
- Highlight any important text within the email.
- Right-click on your mouse and select Jibble from the menu.
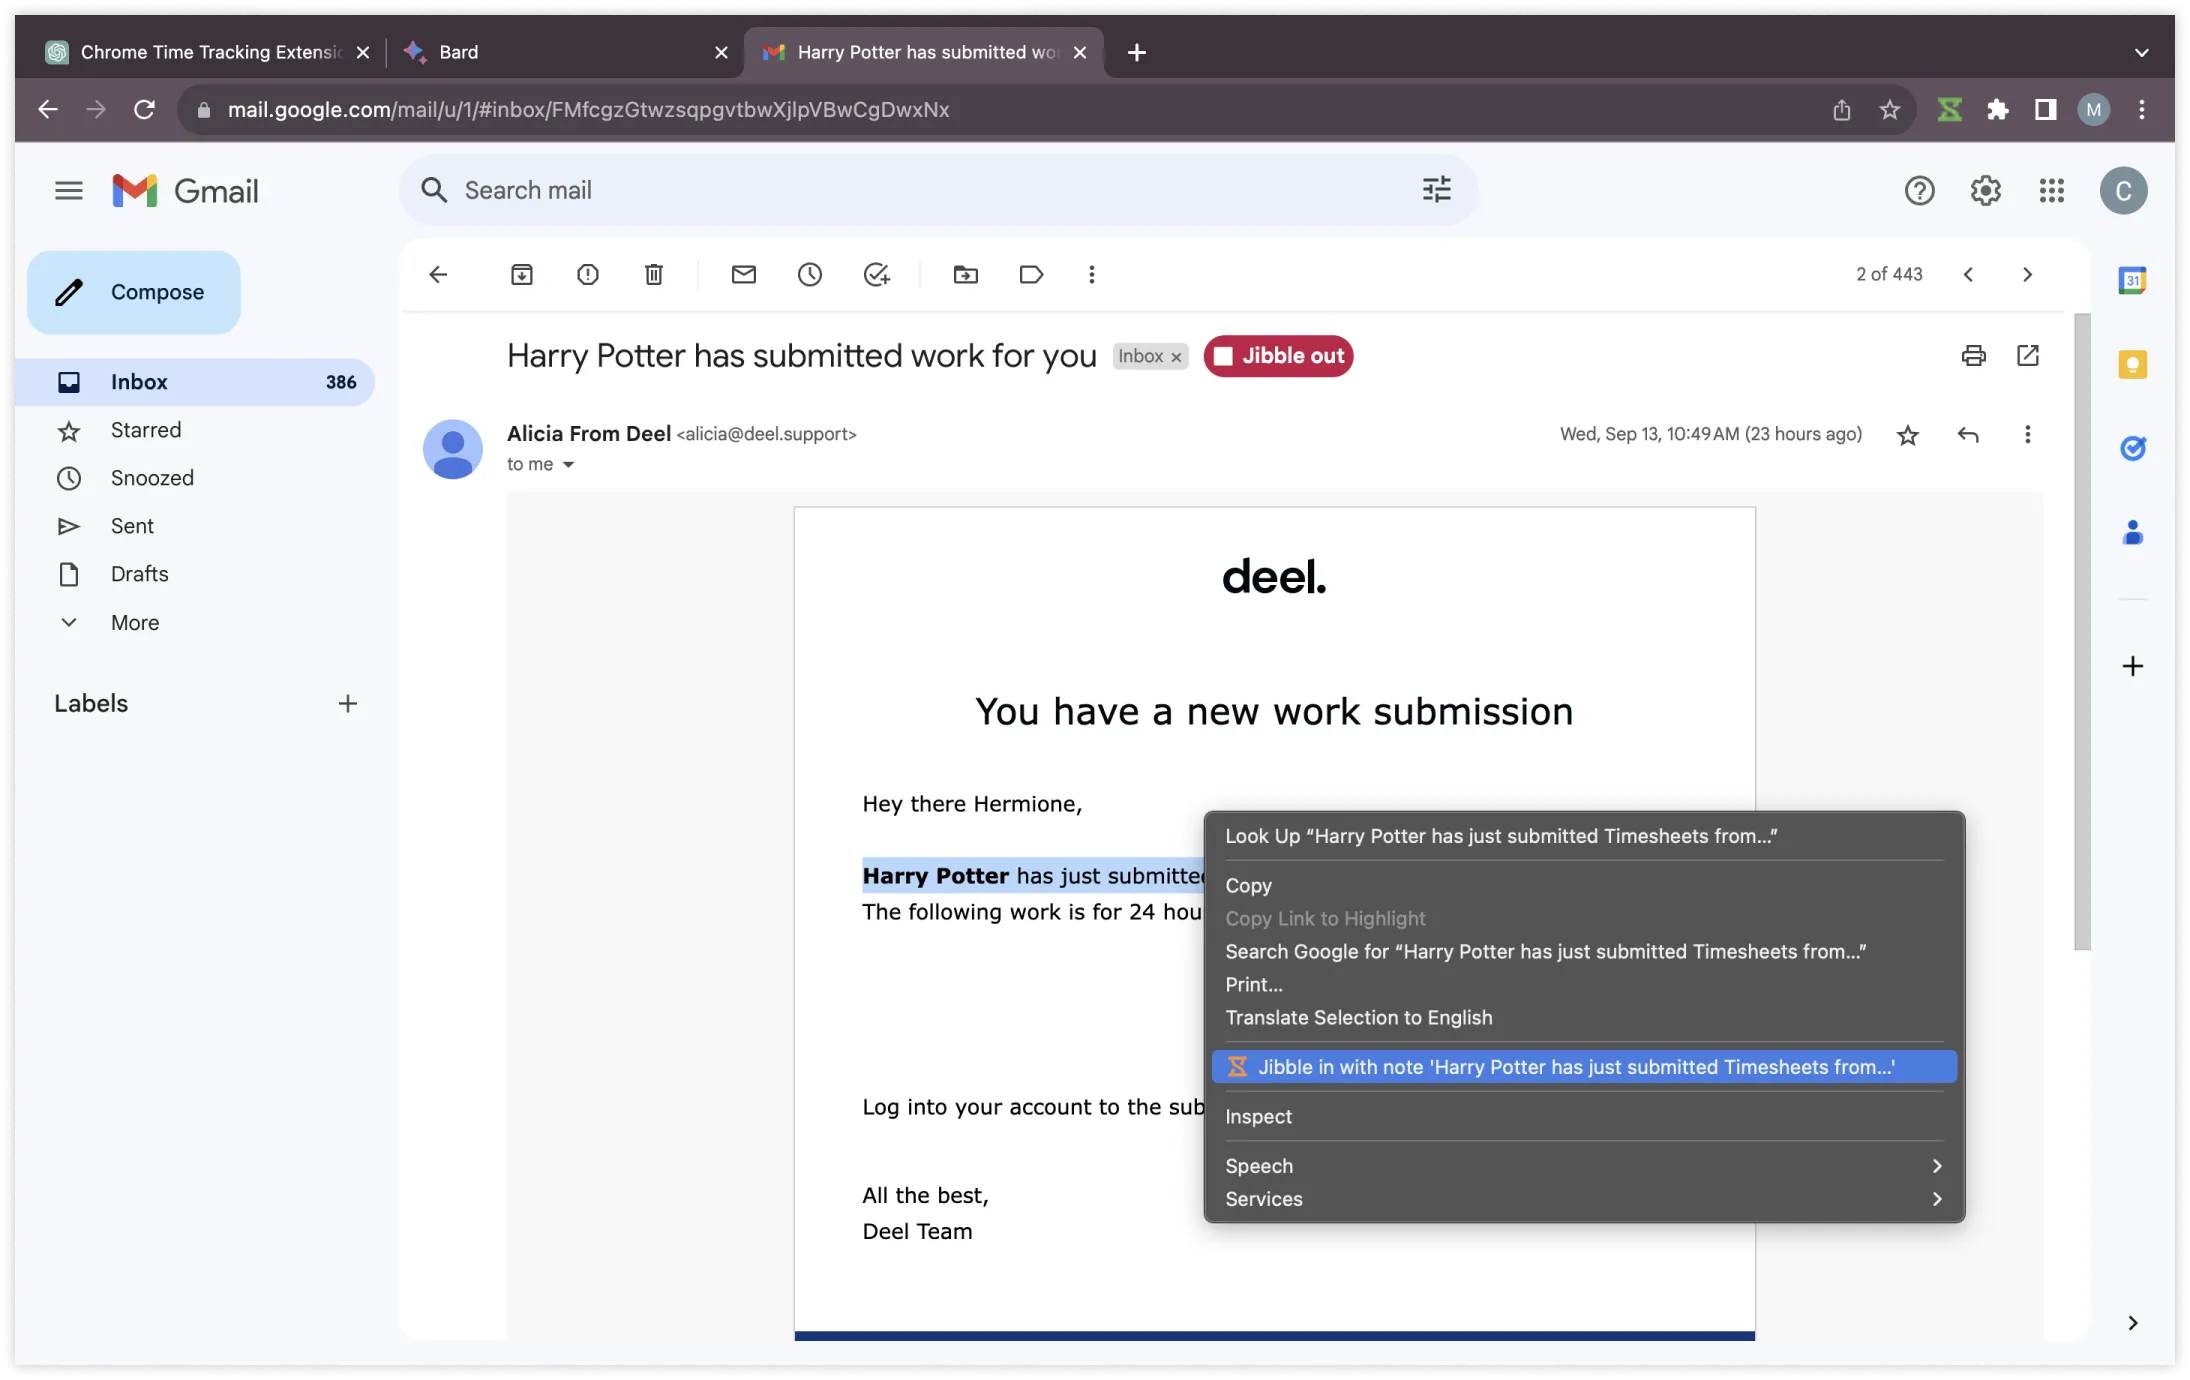
- The clock-in screen will appear with your highlighted text automatically populated as notes.
- Select an activity and project if needed.
- Click on on Save to start the timer.