Connecting Zapier with Jibble
Integrate our time tracking software with the tools you use everyday
Zapier lets you connect Jibble with thousands of the tools you use everyday.
Zapier transfers info between your apps automatically with workflows called ‘Zaps’, so you can automate repetitive tasks with no developer assistance.
This article covers:
What you can automate with Zapier
-
Employee data
-
Clock in
-
Clock out
-
Breaks
-
Invite new team member
-
Time entry
-
Timesheets
-
Groups
-
List of Activities
-
List of Projects
-
List of Clients
-
Work Schedules – coming soon!
Examples of automations you can create
-
Clock in from Jibble when a Google calendar event starts
-
Create a new event in Google calendar when you clock in from Jibble
-
Create new timesheet entries in Jibble when Google calendar starts
-
Add new Jibble time entries to Google Sheets
-
Add new Jibble projects to Google Sheets
-
Add new Jibble activities to Google Sheets
-
Create projects in Jibble when you create new Asana projects
-
Create projects in Asana when you create new Jibble projects
-
Share time entries from Jibble in Slack
-
Adjust or Create Slack status when you start a new time entry in Jibble
Connecting Zapier to Jibble
-
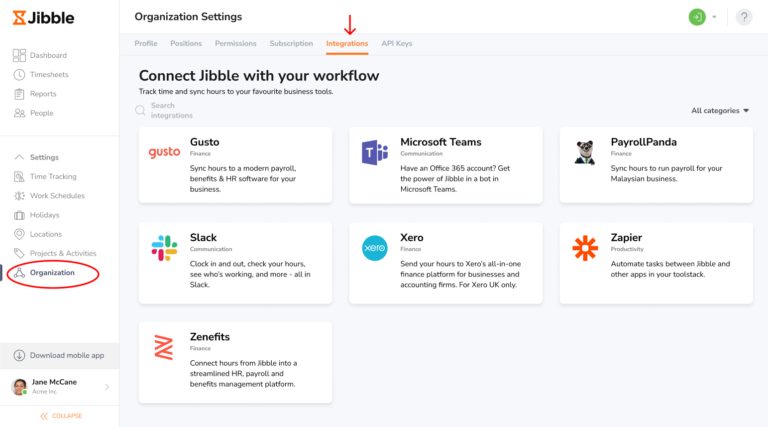
Login to Jibble and click on Organization Settings.
-
Select the Integrations tab and find Zapier on the list of the Integrations available.
-
You will see a modal that integrates with Zapier. Click on Go to Zapier.

-
You will now be directed to Zapier.
Setting up your Zapier Integration
-
Create a Zapier account to create Zaps. You can run 5 Zaps on your free Zapier account.
-
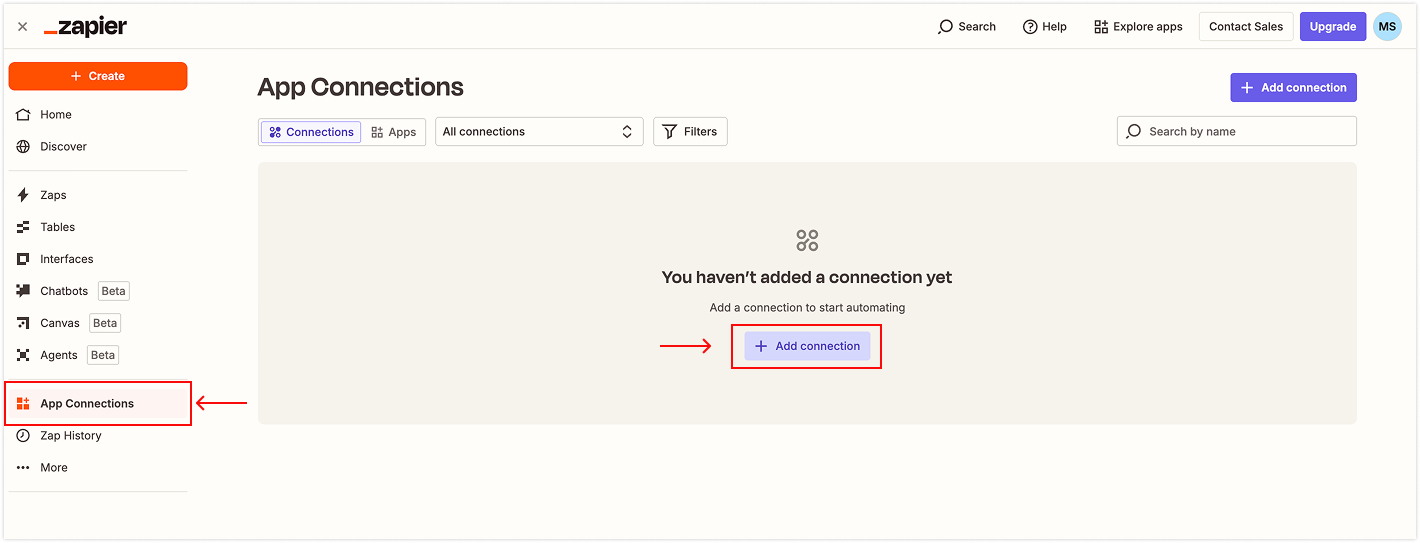
In Zapier, head to App Connections and click on Add Connection.
-
Search for Jibble and select it from the dropdown.
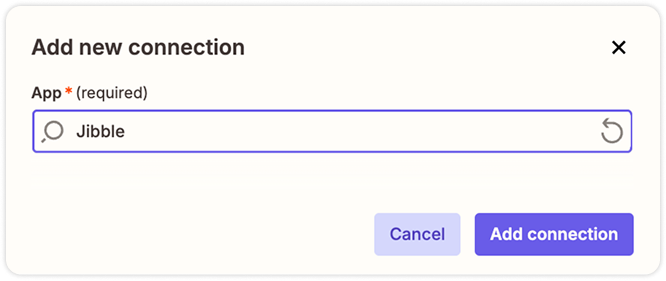
- Click on Add Connection.
-
You will be redirected to authorize your connection.

-
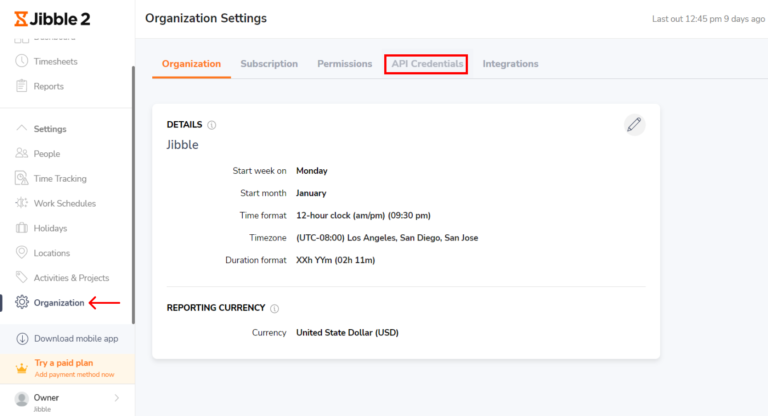
Head to the API Credentials tab under Organization Settings in Jibble to generate your Client ID and Client Secret.
-
Click on Create New Secret and name your API Key.
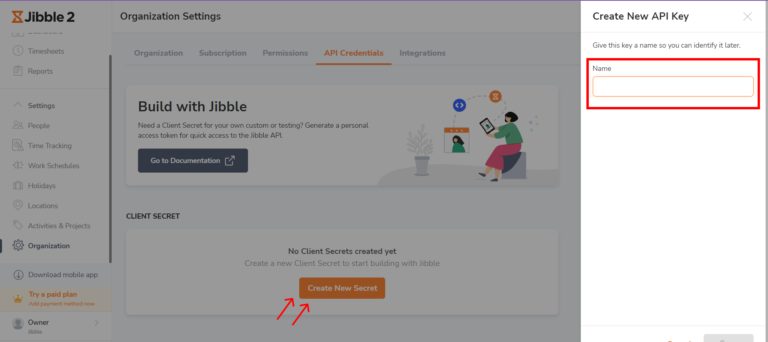
-
Copy the Client ID and Client Secret and paste it in the Zapier authorization modal shown in step 5.

-
Authorize the connection.
-
You can now create your first Zap. Use a pre-existing Zap or create your own custom setup with Zap Editor.
-
Each Zap creates a “Trigger” in one app (which holds the information you wish to transfer automatically), and initiates an “Action” in another app (where your data is sent automatically).
For more information on creating zaps, please get in touch with Zapier’s support team or refer to their help article.